
Constructing a Complete Outfit SS2 Fashion and Garment Making Lesson Note
Download Lesson NoteTopic: Constructing a Complete Outfit
The Master Plan (Before You Sew)
A “Complete Outfit” is more than just two pieces of clothing; it is a coordinated look. Before you start your machine, you need to check your “Inventory.”
- Fabric Matching: Check that the grainlines on your blouse match the grainlines on your skirt or trousers. If one is cut slightly “off-bias,” the outfit will twist when you walk.
- Thread and Notion Check: Do you have enough matching thread for both pieces? Do your zippers match? If you are using gold buttons on the blouse, do you have a gold buckle or hook for the skirt? Small mismatches are very noticeable in a complete set.
- Pattern Markings: Ensure all your notches (those little snips in the seam allowance) are marked. These are your “road signs”—they tell you exactly where the sleeve meets the armhole and where the side seams should join.
Step 1 – Building the “Body” (The Blouse/Top)
We usually start with the top because it has more “small parts” like collars and cuffs.
The Order of Work:
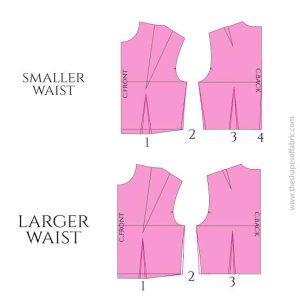
- Darts and Shaping: Sew all darts first. Press them toward the center. This turns your flat fabric into a 3D shape.
- The Shoulder “Bridge”: Join the front and back at the shoulders. Pro Tip: If the blouse is heavy, sew a small piece of tape into the shoulder seam so it doesn’t stretch out over time.
- Neckline/Collar: It is much easier to fix a collar or a facing while the blouse is still open at the sides.
- Sleeves: Use the “Ease-stitch” method we practiced. Gently pull the threads so the sleeve cap “cups” onto the shoulder perfectly.
Step 2 – The Lower Garment (Skirt or Trousers)
The bottom half of your outfit must be strong because it takes the most “stress” when we sit, climb stairs, or walk.
Key Construction Areas:
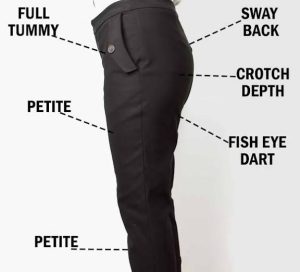
- The Crotch/Seat (for Trousers): This is the “U” seam. Double-stitch this area! Use a slightly smaller stitch length for extra strength so the seam doesn’t pop.
- The Zipper: Whether it’s a side zip or a back zip, ensure it is flat. If the fabric “bubbles” over the zipper, it means you pulled the fabric too hard while sewing.
- The Waistband: This is the “Anchor.” A complete outfit looks professional when the waistband is crisp. Use a firm interfacing (stiffening) so the waist stays sharp all day.
Step 3 – The “Marriage” (Fitting the Set)
This is where we check if the two pieces “talk” to each other. This is called a Mid-Way Fitting.
What to look for:
- The Side-Seam Alignment: Put both pieces on. Does the side seam of the blouse line up perfectly with the side seam of the skirt? If they are shifted, the outfit will look “cheap” or poorly made.
- The Length: Check the hem of the blouse. Does it sit at a flattering height above the skirt/trousers?
- The Movement: Sit down. Lift your arms. If the outfit feels tight in the armpits or the seat, you may need to “let out” the seam allowance by 0.5cm.
Tailor’s Secret: Always fit your clothes with the shoes you plan to wear. This changes your posture and ensures the trouser/skirt length is perfect!
The Grand Finale (Finishing & QC)
A “Complete Outfit” is only finished when the Quality Control (QC) is done.
- The Thread Hunt: Take your small “snips” or embroidery scissors and go over every inch of the outfit. Cut off every “hanging” thread. A clean outfit looks like it came from a high-end boutique.
- Fastenings: Ensure your buttons are sewn on tight. If you used a hook and eye at the waist, make sure it is sewn with a double thread.
- The Final Steam Press: This is the most important step in the workshop. You aren’t just “ironing”; you are molding the fabric. Press the collar flat, press the darts to one side, and make sure the hems are crisp.
Summary Task: Look at your finished outfit. If you had to sell this in a shop today, what price would you put on it based on the neatness of your seams?
Second Term Fashion and Garment Making Lesson Notes for Other Topics

Exam Prep and Coaching
Explore lesson notes covering all topics.

Mock Project III
Explore lesson notes covering all topics.

Mock Project II
Explore lesson notes covering all topics.

Mock Project I
Explore lesson notes covering all topics.

SSCE Past Questions - Practical
Explore lesson notes covering all topics.

SSCE Past Questions - Theory
Explore lesson notes covering all topics.

Revision of Major Skills
Explore lesson notes covering all topics.

Fashion Accessories
Explore lesson notes covering all topics.

Trimmings and Decorative Features
Explore lesson notes covering all topics.

Linings and Interlining
Explore lesson notes covering all topics.

Waistband and Facings
Explore lesson notes covering all topics.

Pockets
Explore lesson notes covering all topics.

Fastenings and Openings II
Explore lesson notes covering all topics.

Fastenings and Openings I
Explore lesson notes covering all topics.
Practical (Sewing Simple Articles)
Explore lesson notes covering all topics.


Lesson Notes for Other Classes

Basic 1 Lesson Note
The complete lesson note to guide your studies.

Basic 2 Lesson Note
The complete lesson note to guide your studies.

Basic 3 Lesson Note
The complete lesson note to guide your studies.

Basic 4 Lesson Note
The complete lesson note to guide your studies.

Basic 5 Lesson Note
The complete lesson note to guide your studies.

Basic 6 Lesson Note
The complete lesson note to guide your studies.