
Simple Machine (Lever) Basic 6 Basic Technology Lesson Note
Download Lesson NoteTopic: Simple Machine (Lever)
LEARNING OBJECTIVES By the end of the lesson, pupils should be able to:
- Explain what a simple machine is
- Define what a lever means and state some examples
- Draw and label different types of lever
- Discuss the use of lever
DEFINITION OF SIMPLE MACHINE
A simple machine is a device that makes work easier by changing the direction or magnitude of force needed to do the work. Simple machines have few or no moving parts and help us perform tasks with less effort.
Key Points:
- Makes work easier
- Reduces effort needed
- Does not use electricity or fuel
- Basic mechanical devices
- Building blocks of complex machines
THE SIX TYPES OF SIMPLE MACHINES
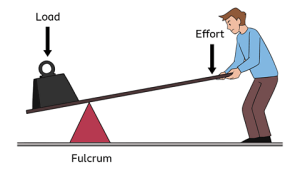
- Lever – A rigid bar that pivots on a fixed point
- Pulley – A wheel with a rope or chain

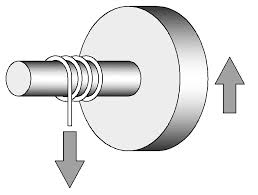
- Wheel and Axle – A wheel attached to a rod
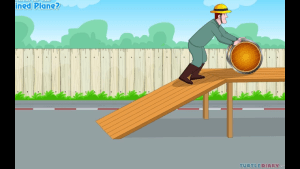
- Inclined Plane – A sloping surface
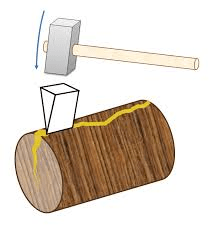
- Wedge – Two inclined planes joined together
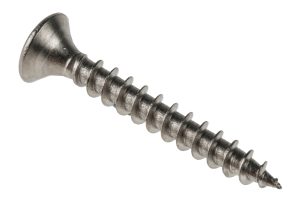
- Screw – An inclined plane wrapped around a cylinder
DEFINITION OF LEVER
A lever is a rigid bar or plank that moves on a fixed point called a fulcrum. It is used to lift or move loads with less effort. Levers help us do work by magnifying the force we apply.
Simple Definition: A lever is a bar that rests on a support point and helps lift heavy things easily.
PARTS OF A LEVER
Every lever has three main parts:
- FULCRUM (F):
- The fixed point on which the lever pivots or rotates
- The support point
- Can be in different positions depending on lever type
- Also called the pivot point
- Does not move
- LOAD (L):
- The object or weight to be moved or lifted
- The resistance that needs to be overcome
- What you want to move
- Can be heavy or light
- EFFORT (E):
- The force applied to move the load
- The push or pull you apply
- Where you apply your strength
- Can be large or small depending on lever type
HOW A LEVER WORKS
A lever works on the principle of moments. When you apply effort at one end, the lever pivots on the fulcrum and moves the load at the other end. The position of the fulcrum determines how much force is needed.
Important Principle: The closer the fulcrum is to the load, the easier it is to lift the load with less effort.
Example: Using a long stick to lift a heavy rock – you push down on one end (effort), the stick pivots on a stone (fulcrum), and the rock lifts up (load).
TYPES OF LEVERS
Levers are classified into three types based on the position of the fulcrum, load, and effort.
- FIRST CLASS LEVER
Position: The fulcrum is positioned BETWEEN the effort and the load.
Formula/Arrangement: EFFORT — FULCRUM — LOAD or E — F — L
How It Works:
- Push down on one end (effort)
- Fulcrum in the middle
- Other end lifts the load
- Changes direction of force
Examples:
At Home:
- Seesaw/Teeter-totter (playground equipment)
- Scissors (fulcrum is the screw joining the blades)
- Pliers (fulcrum is the joint)
- Crowbar/Iron bar (when removing nails or lifting objects)
- Claw hammer (when removing nails from wood)
- Bottle opener (some types)
- Balance scale/weighing balance
In Daily Life:
- Beam balance
- Can opener (some types)
- Nail clippers
- Tin snips
- Shears
Advantages:
- Can change direction of force (push down to lift up)
- Can increase force or speed depending on fulcrum position
- Versatile and commonly used
Drawing a First Class Lever:
EFFORT ↓
|
___________________
△ FULCRUM
↑
LOAD
- SECOND CLASS LEVER
Position: The load is positioned BETWEEN the fulcrum and the effort.
Formula/Arrangement: FULCRUM — LOAD — EFFORT or F — L — E
How It Works:
- Fulcrum at one end
- Load in the middle
- Apply effort at the other end
- Always provides mechanical advantage (less effort needed)
- Does not change direction of force
Examples:
At Home:
- Wheelbarrow (wheel is fulcrum, load in bucket, push handles)
- Nutcracker (hinge is fulcrum, nut in middle, squeeze handles)
- Bottle opener (edge on bottle cap is fulcrum)
- Garlic press
- Door (hinges are fulcrum, door weight is load, push door edge)
In Daily Life:
- Stapler (when stapling paper)
- Paper punch
- Can crusher
- Lemon squeezer
- Oars when rowing (when water is fulcrum)
Body Examples:
- Standing on tiptoes (toes are fulcrum, body weight is load, calf muscles provide effort)
- Pushing a door open
Advantages:
- Always makes work easier (mechanical advantage)
- Reduces effort needed significantly
- Good for lifting heavy loads
Drawing a Second Class Lever:
△ FULCRUM ↑ EFFORT
|________________|
↑
LOAD
- THIRD CLASS LEVER
Position: The effort is positioned BETWEEN the fulcrum and the load.
Formula/Arrangement: FULCRUM — EFFORT — LOAD or F — E — L
How It Works:
- Fulcrum at one end
- Apply effort in the middle
- Load at the other end
- Does NOT reduce effort needed
- Increases speed and range of motion
- Requires more effort but moves load faster and farther
Examples:
Sports Equipment:
- Baseball bat (hands at fulcrum end, swing middle, hit ball at end)
- Cricket bat
- Hockey stick
- Tennis racket
- Golf club
- Fishing rod (when casting)
Tools:
- Broom (one hand at top is fulcrum, other hand provides effort, bristles at end move dirt)
- Rake
- Shovel (when lifting soil)
- Tweezers/Tongs (joint is fulcrum, fingers provide effort, tips grip load)
- Ice tongs
- Kitchen tongs
Human Body: Many parts of our body work as third class levers:
- Arm: Elbow is fulcrum, bicep muscle (in middle) provides effort, hand holds load
- Jaw: Joint is fulcrum, muscles provide effort, teeth at end bite food
- Leg: Hip is fulcrum, thigh muscles provide effort, foot kicks ball
Advantages:
- Increases speed of movement
- Increases range of motion
- Allows precise control
- Good for throwing, hitting, sweeping
Disadvantages:
- Requires more effort
- Does not reduce work
- Less mechanical advantage
Drawing a Third Class Lever:
△ FULCRUM
|__________↑___________|
EFFORT ↑
LOAD
COMPARISON TABLE OF LEVER TYPES
| Feature | First Class | Second Class | Third Class |
| Position | E-F-L | F-L-E | F-E-L |
| Fulcrum Location | Between E and L | At one end | At one end |
| Mechanical Advantage | Can increase force or speed | Always increases force | Increases speed |
| Effort Needed | Can be less or more | Always less | Always more |
| Changes Direction | Yes | No | No |
| Common Use | General purpose | Lifting heavy loads | Speed and range |
| Examples | Seesaw, scissors | Wheelbarrow, nutcracker | Baseball bat, broom |
USES AND ADVANTAGES OF LEVERS
- Makes Work Easier:
- Reduces effort needed to lift heavy objects
- A small force can move a large load
- Helps lift things we couldn’t lift alone
- Multiplies Force:
- Mechanical advantage
- Can lift several times your own strength
- Used in construction and industry
- Changes Direction of Force:
- Push down to lift up (first class lever)
- Easier to push down than lift up
- More convenient positioning
- Increases Speed and Range:
- Third class levers move loads quickly
- Extends reach (like using a long stick)
- Useful in sports and activities
- Provides Precision:
- Tweezers for picking small objects
- Scissors for accurate cutting
- Fine motor control
- Saves Energy:
- Less effort means less energy spent
- Can work longer without tiring
- More efficient work
- Simple and Reliable:
- No electricity needed
- Few parts to break
- Easy to make and maintain
- Lasts long time
- Versatile:
- Used in countless applications
- From simple tools to complex machines
- Part of many devices we use daily
PRACTICAL APPLICATIONS OF LEVERS
In Construction:
- Crowbars to remove nails and lift heavy objects
- Wheelbarrows to transport materials
- Jacks to lift vehicles
In Agriculture:
- Hoes for digging
- Rakes for gathering
- Shovels for lifting soil
- Pitchforks for moving hay
In the Home:
- Kitchen tools (can openers, bottle openers, nutcrackers)
- Cutting tools (scissors, shears, pruners)
- Cleaning tools (brooms, mops)
- Door handles and knobs
In Medicine:
- Surgical scissors
- Forceps
- Bone levers (for surgery)
In Music:
- Piano keys (first class lever)
- Guitar frets
- Drum pedals
In Transportation:
- Car brake pedals
- Gear shifts
- Steering wheel (wheel and axle, which contains lever principles)
MECHANICAL ADVANTAGE
Mechanical advantage is the factor by which a machine multiplies the force applied to it.
Formula: Mechanical Advantage (MA) = Load ÷ Effort
Example: If you apply 10N of effort and lift a 50N load, the mechanical advantage is: MA = 50N ÷ 10N = 5
This means the lever multiplies your force by 5 times.
How to Increase Mechanical Advantage:
- Move fulcrum closer to load
- Use longer lever arm on effort side
- Position effort farther from fulcrum
THE PRINCIPLE OF MOMENTS
For a lever in balance: Effort × Distance from fulcrum to effort = Load × Distance from fulcrum to load
This explains why:
- A small effort far from fulcrum can lift heavy load close to fulcrum
- Moving the fulcrum changes the balance
- Longer levers can lift heavier loads
SIMPLE EXPERIMENTS WITH LEVERS
Experiment 1: Make a First-Class Lever
Materials:
- Ruler (30cm)
- Pencil (as fulcrum)
- Small objects (eraser, coins)
Procedure:
- Place pencil under middle of ruler (fulcrum)
- Put eraser on one end (load)
- Press down other end (effort)
- Observe how eraser lifts
Experiment 2: Test Different Positions
Procedure:
- Move pencil (fulcrum) closer to eraser (load)
- Notice it’s easier to lift
- Move fulcrum away from load
- Notice it’s harder to lift
Conclusion: Fulcrum closer to load makes lifting easier.
Experiment 3: Make a Wheelbarrow Model (Second Class)
Materials:
- Cardboard box
- Two pencils as wheels
- String
Procedure:
- Attach wheels to one end
- Load box with books
- Lift other end
- Notice it’s easier than lifting box directly
FAMOUS QUOTE ABOUT LEVERS
Archimedes, the ancient Greek scientist who studied levers, famously said:
“Give me a place to stand, and I shall move the Earth.”
This means with a long enough lever and a fulcrum, theoretically you could move anything, even the Earth!
EVALUATION
- Define a simple machine
- What is a lever?
- Name and explain the three parts of a lever
- Draw and label one example of each type of lever
- List five everyday tools that are levers
Third Term Basic Technology Lesson Notes for Other Topics

Health and Hygiene
Explore lesson notes covering all topics.

Simple Machines
Explore lesson notes covering all topics.

Booting
Explore lesson notes covering all topics.

Teeth Brushing
Explore lesson notes covering all topics.

Simple Machines - The Safe Use of Simple Machines
Explore lesson notes covering all topics.

Care of the Nails and Hair
Explore lesson notes covering all topics.

Concept of Technology
Explore lesson notes covering all topics.

Steps of Booting
Explore lesson notes covering all topics.

Cleanliness
Explore lesson notes covering all topics.

Technology in Home - Electric Gadgets
Explore lesson notes covering all topics.

First Aid
Explore lesson notes covering all topics.

Technology in Transportation - Land and Air
Explore lesson notes covering all topics.

First Aid (Continued)
Explore lesson notes covering all topics.

What Is Water Transportation?
Explore lesson notes covering all topics.

My Desktop (Review)
Explore lesson notes covering all topics.
Lesson Notes for Other Classes

Basic 1 Lesson Note
The complete lesson note to guide your studies.

Basic 2 Lesson Note
The complete lesson note to guide your studies.

Basic 3 Lesson Note
The complete lesson note to guide your studies.

Basic 4 Lesson Note
The complete lesson note to guide your studies.

Basic 5 Lesson Note
The complete lesson note to guide your studies.

JSS1 Lesson Note
The complete lesson note to guide your studies.