Soil (II): Growing of Plants & Waste Disposal – Basic 4 Basic Science Lesson Note (Second Term)
Download Lesson NoteLesson note at a glance
- Subject
- Basic Science
- Class
- Basic 4
- Term
- Second Term
- Topic
- Soil (II): Growing of Plants & Waste Disposal
- Order
- Topic 3 of 9 this term
- Reading time
- 9 min
Topic: soil (II): growing of plants
LEARNING AREA
- Introductory Activities
- Preparing Soil for Plants
- How to Plant Seeds
- Taking Care of Plants
PERFORMANCE OBJECTIVES
By the end of this lesson, pupils should be able to:
- Prepare soil for planting.
- Plant seeds correctly.
- Water and care for plants.
- Know what plants need to grow.
TEACHING AND LEARNING MATERIALS
- Small pots or containers
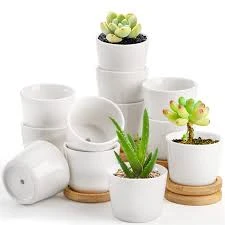
- Garden soil

- Seeds (beans or marigold)

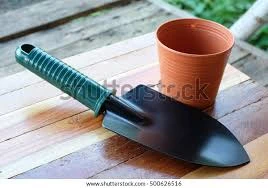
- Small spade/spoon
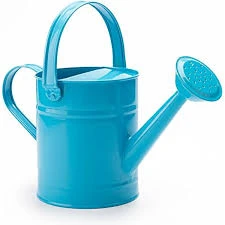
- Watering can
- Ruler
TEACHING AND LEARNING METHOD
- Simple demonstration
- Hands-on planting
- Show and tell
REFERENCE MATERIALS
- Primary Science Textbook
- Simple Gardening Guide
ENTRY BEHAVIOUR/ PREVIOUS LESSON
Students know that plants grow in soil and need water.
WORD FILE
Plant, soil, seeds, water, grow, care.
CONTENT
LESSON 1 – PREPARING SOIL FOR PLANTS
WHAT IS SOIL PREPARATION?
Getting soil ready for plants to grow well.
WHY PREPARE SOIL?
- Make soil soft
- Help plants grow strong
- Remove weeds and stones
HOW TO PREPARE SOIL:
STEP 1: CLEAN THE SOIL
- Remove stones and sticks
- Pull out weeds
- Make soil smooth
STEP 2: MAKE SOIL SOFT
- Use small spade to dig
- Break up hard lumps
- Mix soil well
STEP 3: ADD GOOD THINGS
- Add dried leaves if available
- Mix with hands
- Make soil dark and rich
LESSON 2 – PLANTING SEEDS
WHAT IS PLANTING?
Putting seeds in soil so they can grow into plants.
WHAT SEEDS NEED:
- Good soil
- Right depth
- Water
- Sunlight
HOW TO PLANT SEEDS:
STEP 1: MAKE HOLES
- Use finger to make small holes
- Make holes 2cm deep
- Space holes apart
STEP 2: PUT SEEDS IN
- Drop one seed in each hole
- Cover with soil
- Press soil gently
STEP 3: WATER GENTLY
- Sprinkle water on soil
- Don’t use too much water
- Keep soil moist
LESSON 3 – TAKING CARE OF PLANTS
WHAT IS PLANT CARE?
Helping plants grow by giving them what they need.
WHAT PLANTS NEED:
WATER:
- Water every day
- Not too much water
- Water in the morning
SUNLIGHT:
- Put plants in bright place
- Plants need light to grow
- Move pots to sunny spots
GOOD SOIL:
- Keep soil soft
- Remove weeds
- Add more soil if needed
DAILY PLANT CARE:
MORNING:
- Check if soil is dry
- Water if needed
- Look at plant growth
AFTERNOON:
- Make sure plant gets sun
- Remove dead leaves
- Keep pots clean
SIGNS OF HEALTHY PLANTS:
- Green leaves
- Growing taller
- New leaves coming
- Strong stem
SIGNS PLANTS NEED HELP:
- Yellow leaves
- Dry soil
- Plant falling over
- No new growth
PRESENTATION
- Teacher shows soil in pot
- Teacher removes stones and weeds
- Teacher digs soil to make it soft
- Teacher plants bean seed step by step
- Teacher waters the planted seed
- Teacher explains daily care routine
STUDENT ACTIVITIES
Students practice:
- Cleaning soil in their pots
- Making soil soft with hands
- Planting their own seeds
- Watering their plants gently
- Setting up plant care schedule
EVALUATIVE ACTIVITIES
- Clean soil and remove stones
- Plant a seed correctly
- Water plant properly
- Name three things plants need
LESSON EVALUATION/ASSIGNMENT
Each student will:
- Take pot home
- Water plant every day
- Watch for first leaves
- Bring back in one week to show growth
WORKBOOK
WEEKLY ASSESSMENT (TEST)
- Before planting, we must _______ the soil. A. Clean B. Color
- Seeds should be planted _______ deep. A. Very deep B. 2cm
- Plants need water, soil, and _______. A. Sunlight B. Salt
- We should water plants in the _______. A. Morning B. Night
- Healthy plants have _______ leaves. A. Yellow B. Green
PRACTICAL ACTIVITIES
- Soil Preparation: Clean soil and make it soft in pot
- Seed Planting: Plant bean seed at correct depth
- Plant Care: Water plant and place in sunny spot
Topic: environmental health
LEARNING AREA
- Introductory Activities
- Meaning of Waste Disposal
- Sewage Disposal
- Refuse Disposal
PERFORMANCE OBJECTIVES
By the end of this lesson, pupils should be able to:
- Explain what waste disposal means.
- Know about sewage disposal.
- Understand refuse disposal.
- Keep their environment clean.
TEACHING AND LEARNING MATERIALS
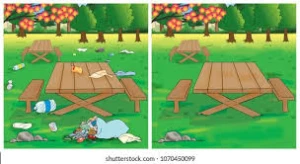
- Pictures of clean and dirty environments
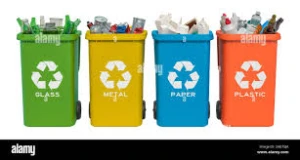
- Waste bin

- Examples of refuse (paper, bottles, cans)
- Charts showing proper waste disposal
TEACHING AND LEARNING METHOD
- Simple explanation
- Show and tell
- Discussion
REFERENCE MATERIALS
- Primary Health Education Textbook
- Environmental Health Guide
ENTRY BEHAVIOUR/ PREVIOUS LESSON
Students know the difference between clean and dirty places.
WORD FILE
Waste, disposal, sewage, refuse, clean, dirty.
CONTENT
LESSON 1 – MEANING OF WASTE DISPOSAL
WHAT IS WASTE?
Waste is anything we don’t need anymore and want to throw away.
EXAMPLES OF WASTE:
- Used paper
- Empty bottles
- Food leftovers
- Old clothes
- Dirty water
WHAT IS WASTE DISPOSAL?
Waste disposal means getting rid of waste in the right way to keep our environment clean and safe.
WHY DISPOSE WASTE PROPERLY?
- Keep our homes clean
- Prevent bad smells
- Stop germs from spreading
- Make our environment beautiful
- Keep us healthy
WRONG WAY TO DISPOSE WASTE:
- Throwing on the ground
- Putting in drinking water
- Leaving in the house
- Burning near people
RIGHT WAY TO DISPOSE WASTE:
- Put in waste bins
- Bury in proper places
- Give to waste collectors
- Recycle if possible
LESSON 2 – SEWAGE DISPOSAL
WHAT IS SEWAGE?
Sewage is dirty water from our homes that comes from:
- Toilets
- Bathrooms
- Kitchen sinks
- Washing clothes
WHY SEWAGE IS DANGEROUS:
- Contains germs
- Causes bad smells
- Can make people sick
- Attracts flies and mosquitoes
HOW TO DISPOSE SEWAGE PROPERLY:
AT HOME:
- Use proper toilets
- Don’t pour dirty water anywhere
- Have good drainage
- Keep toilet clean
IN THE COMMUNITY:
- Build proper sewers
- Have waste treatment places
- Don’t put sewage in rivers
- Use pit latrines correctly
SIMPLE RULES:
- Always use the toilet
- Wash hands after using toilet
- Don’t play near sewage
- Tell adults about sewage problems
LESSON 3 – REFUSE DISPOSAL
WHAT IS REFUSE?
Refuse is solid waste we throw away from our homes like:
- Food waste (peels, bones)
- Paper and cardboard
- Plastic bottles and bags
- Metal cans
- Glass bottles
TYPES OF REFUSE:
BIODEGRADABLE REFUSE:
- Food waste
- Leaves
- Paper
- These rot away naturally
NON-BIODEGRADABLE REFUSE:
- Plastic
- Glass
- Metal
- These don’t rot easily
HOW TO DISPOSE REFUSE PROPERLY:
AT HOME:
- Use waste bins with covers
- Empty bins regularly
- Separate different types of waste
- Don’t throw on the ground
IN THE COMMUNITY:
- Put refuse in public bins
- Wait for waste collectors
- Use designated dump sites
- Don’t litter streets
3 Rs OF WASTE MANAGEMENT:
REDUCE:
- Use less things
- Don’t waste food
- Buy only what you need
REUSE:
- Use bottles again
- Give old clothes to others
- Use paper on both sides
RECYCLE:
- Make new things from old ones
- Give plastic to recycling centers
- Turn food waste into compost
DANGERS OF POOR REFUSE DISPOSAL:
- Attracts rats and cockroaches
- Causes bad smells
- Blocks drainage
- Makes environment ugly
- Spreads diseases
KEEPING OUR ENVIRONMENT CLEAN:
AT SCHOOL:
- Use school waste bins
- Don’t throw papers on ground
- Clean your classroom
- Report broken waste bins
AT HOME:
- Help parents dispose waste
- Keep your room clean
- Don’t throw things from windows
- Sweep around your house
IN THE COMMUNITY:
- Don’t litter when walking
- Use public waste bins
- Join community cleanup
- Tell others to dispose waste properly
PRESENTATION
- Teacher shows pictures of clean and dirty environments
- Teacher explains what waste is using real examples
- Teacher demonstrates proper way to use waste bin
- Teacher explains dangers of poor sewage disposal
- Teacher shows different types of refuse
- Teacher demonstrates the 3 Rs with examples
STUDENT ACTIVITIES
Students practice:
- Identifying different types of waste
- Putting refuse in correct bins
- Explaining why we need waste disposal
- Naming places where sewage comes from
- Demonstrating the 3 Rs
EVALUATIVE ACTIVITIES
- Define waste disposal
- Name two types of refuse
- Explain why sewage is dangerous
- Show how to use waste bin properly
LESSON EVALUATION/ASSIGNMENT
Students will:
- Clean their classroom properly
- Help dispose waste at home correctly
- Count waste bins in their neighborhood
- Report any sewage problems to teacher
WORKBOOK
WEEKLY ASSESSMENT (TEST)
- Waste disposal means getting rid of waste in the _______ way. A. Wrong B. Right
- Sewage is dirty water from _______. A. Rivers B. Our homes
- _______ refuse rots away naturally. A. Biodegradable B. Non-biodegradable
- The 3 Rs are Reduce, Reuse, and _______. A. Recycle B. Remove
- We should put refuse in _______. A. Rivers B. Waste bins
Topic: formatting
LEARNING AREA
- Introductory Activities
- What is Formatting?
- Simple Text Formatting
- Making Text Look Nice
PERFORMANCE OBJECTIVES
By the end of this lesson, pupils should be able to:
- Know what formatting means.
- Make text bold and italic.
- Change text color and size.
- Make their work look neat.
TEACHING AND LEARNING MATERIALS
- Computer/Laptop
- Microsoft PowerPoint
- Projector
- Sample text for practice
TEACHING AND LEARNING METHOD
- Simple demonstration
- Hands-on practice
- Step-by-step guidance
REFERENCE MATERIALS
- Primary Computer Studies Textbook
- Basic Computer Guide for Kids
ENTRY BEHAVIOUR/ PREVIOUS LESSON
Students can type text on a computer.
WORD FILE
Format, bold, italic, color, size, neat.
CONTENT
LESSON 1 – WHAT IS FORMATTING?
WHAT IS FORMATTING?
Formatting means making text look nice and easy to read.
WHY DO WE FORMAT TEXT?
- Make words look beautiful
- Help people read easily
- Make important words stand out
- Make our work look neat
EXAMPLES OF FORMATTING:
- Bold text – thick and dark
- Italic text – slanted letters
- BIG TEXT – large size
- Colored text – red, blue, green
LESSON 2 – SIMPLE TEXT FORMATTING
BASIC FORMATTING TOOLS:
MAKING TEXT BOLD:
- Select the text (highlight it)
- Click the B button
- Text becomes thick
When to use bold:
- Titles and headings
- Important words
- Names
MAKING TEXT ITALIC:
- Select the text
- Click the I button
- Text becomes slanted
When to use italic:
- Book titles
- Special words
- Emphasis
CHANGING TEXT SIZE:
- Select the text
- Click size box (shows numbers like 12, 14, 16)
- Choose bigger number for larger text
Common sizes:
- Small text: 10, 12
- Normal text: 14, 16
- Big text: 18, 20, 24
LESSON 3 – MAKING TEXT LOOK NICE
CHANGING TEXT COLOR:
- Select the text
- Click color button (A with color underneath)
- Choose your favorite color
Good color choices:
- Black for normal text
- Red for important things
- Blue for titles
- Green for good news
COMBINING FORMATS:
You can use many formats together:
- Bold AND colored
- Bold AND italic
- BIG, bold, and colored
FORMATTING RULES:
- Don’t use too many colors – it looks messy
- Use bold for important things only
- Make sure text is easy to read
- Keep similar things the same format
PRACTICE EXAMPLES:
Title formatting:
- Make titles BOLD and BIG
- Use nice colors like blue or red
Normal text formatting:
- Keep normal size (14 or 16)
- Use black color
- Only bold important words
Making lists look nice:
- Use same format for all items
- Maybe use bullets (•)
- Keep spacing even
PRESENTATION
- Teacher types “My School” on computer
- Teacher shows how to select text
- Teacher makes title bold and blue
- Teacher types a sentence and makes one word italic
- Teacher changes text size to show difference
- Teacher demonstrates color changes
STUDENT ACTIVITIES
Students practice:
- Selecting text with mouse
- Making text bold and italic
- Changing text size
- Changing text color
- Creating a nicely formatted title
EVALUATIVE ACTIVITIES
- Select text properly
- Make text bold
- Change text color
- Make text bigger
- Format a simple title nicely
LESSON EVALUATION/ASSIGNMENT
Create a simple document about yourself:
- Title: “About Me” (make it bold and big)
- Write your name (make it red and bold)
- Write your age (make it blue)
- Write your favorite food (make it italic)
WORKBOOK
WEEKLY ASSESSMENT (TEST)
- Formatting means making text look _______. A. Messy B. Nice
- To make text bold, first _______ it, then click B. A. Delete B. Select
- The _______ button makes text slanted. A. I B. U
- Bigger numbers make text _______. A. Larger B. Smaller
- We use _______ text for titles. A. Small B. Bold
This term's Basic Science topics
Basic 4 Second Term · 9 topics
- Soil, Track Event, and Typing and Saving on Microsoft Powerpoint.
- Soil (II): Track Event, and Typing and Saving on Microsoft Powerpoint.
- Soil (II): Growing of Plants & Waste Disposal
- Mixture, Physical Fitness, Virus
- Technology(I), Games: Basketball Skills, Anti-Virus
- Technology III, Game and What Is Coding
- Measurement (Measuring Liquids), Gymnastics, and Coding
- Measurement, Food/Nutrition, Use of Coding
- Shape Construction with Paper(I) and Safety at Home and School
Second Term Basic Science Lesson Notes for Other Topics
Demonstrating Air in Space
Read the full lesson note.
Air
Read the full lesson note.
Light Energy, Uses of Light and Colour
Read the full lesson note.
Colour Identification 1 - Colours of Objects
Read the full lesson note.
Colour Identification II- Road Traffic Light Signs
Read the full lesson note.
Colour Identification III - Road Markings
Read the full lesson note.
Soil
Read the full lesson note.
Soil II: Importance & Things Found in Soil
Read the full lesson note.
Water - Purifying Water
Read the full lesson note.
Water - Packaged Water
Read the full lesson note.
Soil I - Importance to Plants
Read the full lesson note.
Input Devices
Read the full lesson note.
Air in Motion I - Wind
Read the full lesson note.
Air in Motion II - Harmful Effects of Wind
Read the full lesson note.
Water
Read the full lesson note.
Lesson Notes for Other Classes

Basic 1 Lesson Note
The complete lesson note to guide your studies.

Basic 2 Lesson Note
The complete lesson note to guide your studies.

Basic 3 Lesson Note
The complete lesson note to guide your studies.

Basic 5 Lesson Note
The complete lesson note to guide your studies.

Basic 6 Lesson Note
The complete lesson note to guide your studies.
JSS1 Lesson Note
The complete lesson note to guide your studies.