Cleaning Cooking Tools and Equipment – Basic 5 Home Economics Lesson Note (Second Term)
Download this term · ₦1,000Lesson note at a glance
- Subject
- Home Economics
- Class
- Basic 5
- Term
- Second Term
- Topic
- Cleaning Cooking Tools and Equipment
- Order
- Topic 4 of 8 this term
- Reading time
- 4 min
Learning objectives
By the end of the lesson, pupils should be able to: i. match cooking tools and equipment with the appropriate cleaning agent ii. use cleaning agents for cleaning cooking equipment and tools iii. evaluate the use of cleaning agents on cooking tools and equipment
Previous knowledge
Pupils know cooking tools, equipment, and cleaning agents from previous lessons.
Lesson content
A. matching cooking tools with appropriate cleaning agents
- Aluminum Pots and Pans

- Best cleaning agents: Lemon juice, vinegar, baking soda paste
- Avoid: Harsh abrasives that can scratch the surface
- Method: Soak in lemon water, scrub gently with baking soda paste
- Why: Aluminum is soft and can be damaged by harsh scrubbing
- Stainless Steel Items

- Best cleaning agents: Dishwashing liquid, vinegar, baking soda
- Can use: Mild scouring powder for tough stains
- Method: Wash with soapy water, polish with vinegar solution
- Why: Stainless steel is durable but can show water spots
- Non-stick Frying Pans
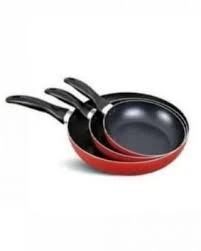
- Best cleaning agents: Mild dishwashing liquid, soft sponge
- Avoid: Steel wool, harsh abrasives, scouring powder
- Method: Soak in warm soapy water, clean with soft sponge
- Why: Non-stick coating can be damaged by rough cleaning
- Glass Items (Bowls, Measuring Cups)
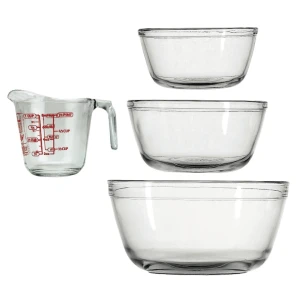
- Best cleaning agents: Vinegar, lemon juice, dishwashing liquid
- Can use: Baking soda for stubborn stains
- Method: Soak in vinegar solution, scrub gently if needed
- Why: Glass is non-porous but can show water spots and film
- Wooden Items (Spoons, Cutting Boards)
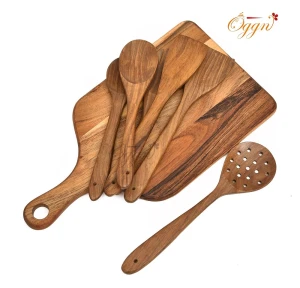
- Best cleaning agents: Salt, lemon juice, mild soap
- Avoid: Soaking in water, harsh chemicals, bleach
- Method: Scrub with salt and lemon, rinse quickly, dry immediately
- Why: Wood can absorb water and odors, may crack if soaked
- Plastic Items
- Best cleaning agents: Baking soda, vinegar, dishwashing liquid
- Can use: Lemon juice for odors and stains
- Method: Soak in baking soda solution, scrub gently
- Why: Plastic can absorb odors and stains easily
B. cleaning procedures for different types of dirt
- Grease and Oil Removal
- Tools affected: Frying pans, cooking pots, serving dishes
- Best agents: Lemon juice, vinegar, dishwashing liquid
- Procedure:
- Remove excess grease with paper towel
- Apply lemon juice or vinegar to the surface
- Let sit for 5 minutes
- Scrub with dishwashing liquid and warm water
- Rinse thoroughly and dry
- Burnt Food Removal
- Tools affected: Cooking pots, frying pans
- Best agents: Baking soda paste, salt, soaking
- Procedure:
- Fill pan with water and let soak for 30 minutes
- Make paste with baking soda and water
- Apply paste to burnt areas
- Let sit for 15 minutes
- Scrub gently with soft brush
- Rinse and wash normally
- Stain Removal
- Tools affected: Plastic containers, cutting boards
- Best agents: Baking soda, lemon juice, salt
- Procedure:
- Make paste with baking soda and lemon juice
- Apply to stained area
- Let sit for 10 minutes
- Scrub with soft brush
- Rinse thoroughly
- Odor Removal
- Tools affected: Plastic containers, wooden items
- Best agents: Baking soda solution, vinegar, lemon
- Procedure:
- Soak in baking soda solution overnight
- Scrub with lemon and salt (for wooden items)
- Rinse well and air dry completely
C. step-by-step cleaning process
- Preparation Steps
- Gather all dirty cooking tools and equipment
- Sort items by material type (aluminum, stainless steel, plastic, etc.)
- Prepare appropriate cleaning agents
- Fill sink with warm water
- Wear gloves if using commercial cleaners
- Pre-cleaning Steps
- Remove excess food particles
- Scrape off burnt or stuck food
- Rinse with warm water to remove loose dirt
- Soak heavily soiled items
- Main Cleaning Steps
- Apply appropriate cleaning agent
- Scrub gently with suitable tool (sponge, brush, cloth)
- Pay attention to corners and crevices
- Rinse thoroughly with clean water
- Check that all dirt and cleaning agent are removed
- Final Steps
- Dry items completely with clean towel or air dry
- Store in clean, dry places
- Clean the sink and work area
- Put away cleaning materials
D. evaluation of cleaning effectiveness
- Visual Inspection
- Good cleaning results:
- No visible dirt, grease, or stains
- Surfaces look bright and clean
- No film or residue remaining
- Items smell fresh and clean
- Poor cleaning results:
- Visible dirt or stains remaining
- Greasy or sticky feel
- Bad odors persist
- Cloudy or filmy appearance
- Testing Cleaning Effectiveness
- Touch test: Items should feel smooth and clean, not sticky or greasy
- Smell test: Items should smell fresh, without food odors
- Water test: Water should sheet off clean surfaces evenly
- Visual test: Items should be bright and free from spots
- When to Re-clean
- If dirt or stains are still visible
- If items still feel greasy or sticky
- If bad odors remain
- If cleaning agent residue is left behind
E. common cleaning mistakes to avoid
- Using Wrong Cleaning Agent
- Using abrasives on non-stick surfaces
- Using harsh chemicals on wooden items
- Mixing different commercial cleaners
- Poor Cleaning Technique
- Not soaking heavily soiled items
- Scrubbing too hard and damaging surfaces
- Not rinsing thoroughly after cleaning
- Safety Mistakes
- Not wearing gloves when needed
- Using cleaning agents near food
- Not reading product labels
Practical activity
Students will practice cleaning different cooking tools using appropriate cleaning agents under supervision.
Teaching AIDS
Various cooking tools, different cleaning agents, cleaning cloths, gloves, demonstration sink area
Evaluation questions
- What cleaning agent is best for aluminum pots?
- Why should we not use steel wool on non-stick pans?
- How do you remove burnt food from a cooking pot?
- List 3 signs of effective cleaning
- What should you do if cleaning agent residue remains on tools?
This term's Home Economics topics
Basic 5 Second Term · 8 topics
- Family Values and Family Cycle
- Resources Family and Personal Resources
- Cleaning Agents for Cooking Tools and Equipment
- Cleaning Cooking Tools and Equipment
- Care of Cooking Tools and Equipment
- Basic Sitches (Permanent Stitches)
- Basic Stitches (Decorative/ Embroidery Stitches)
- Sewing Processes (Production of an Article)
Get Home Economics as PDF and Word
Every week of Basic 5 Home Economics, Second Term, formatted and ready to print. Ad-free, and the copy lock comes off.
Get this term Card, bank transfer, USSD or OPay
Second Term Home Economics Lesson Notes for Other Topics

Kitchen Hygiene
Read the full lesson note.

First Aid Box
Read the full lesson note.
Kitchen: Definition and Types
Read the full lesson note.
Types of Home Cleaning II
Read the full lesson note.
Types of Home Cleaning I
Read the full lesson note.

Home Hygiene
Read the full lesson note.
Clothing Construction Continued. (Production of Seam Album)
Read the full lesson note.
Clothing Construction Continued. (Production of Seam Album)
Read the full lesson note.

Review of First Term Scheme of Work
Read the full lesson note.
Sewing Processes (Production Of An Article)
Read the full lesson note.

Basic Stitches (Decorative/ Embroidery Stitches)
Read the full lesson note.
Care Of Cooking Tools And Equipment
Read the full lesson note.

Basic Sitches (Permanent Stitches)
Read the full lesson note.
Cleaning Agents For Cooking Tools And Equipment
Read the full lesson note.
Resources Family And Personal Resources
Read the full lesson note.
Lesson Notes for Other Classes

Basic 1 Lesson Note
The complete lesson note to guide your studies.

Basic 2 Lesson Note
The complete lesson note to guide your studies.

Basic 3 Lesson Note
The complete lesson note to guide your studies.

Basic 4 Lesson Note
The complete lesson note to guide your studies.

Basic 6 Lesson Note
The complete lesson note to guide your studies.
JSS1 Lesson Note
The complete lesson note to guide your studies.