Soil, Track Event, And Typing And Saving On Microsoft Powerpoint. Basic 4 Basic Science Lesson Note
Download Lesson NoteTopic: Soil, Track Event, And Typing And Saving On Microsoft Powerpoint.
TOPIC: SOIL
LEARNING AREA
- Introductory Activities
- Understanding the Meaning of Soil
- Types of Soil
- Soil Constituents/Components
- Uses of Soil
- Soil Formation Process
- Importance of Soil Conservation
- Practical Soil Investigations
PERFORMANCE OBJECTIVES
By the end of the lesson, the pupils should have attained the following objectives (cognitive, affective and psychomotor) and be able to –
- define soil and explain its formation.
- identify and describe different types of soil.
- list and explain the constituents of soil.
- enumerate various uses of soil in daily life.
- demonstrate simple soil tests and observations.
- understand the importance of soil conservation.
- appreciate soil as a valuable natural resource.
ENTRY BEHAVIOR
The pupils have observed soil in their environment and understand that plants grow in soil and that soil is found on the ground.
INSTRUCTIONAL MATERIALS
The teacher will teach the lesson with the aid of:
- Different soil samples (sandy, clay, loamy)
- Clear containers/jars for soil experiments
- Magnifying glasses

- Water for soil tests
- Small shovels or spoons for digging
- White cloth or paper for soil observation
- Charts showing soil layers
- Pictures of different soil types
- Seeds for planting demonstration
- Measuring cups
- Sieves or strainers
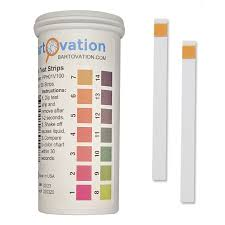
- pH testing strips (optional)
METHOD OF TEACHING
Choose a suitable and appropriate methods for the lessons.
Note – Irrespective of choosing methods of teaching, always introduce an activities that will arouse pupil’s interest or lead them to the lessons.
REFERENCE MATERIALS
- Scheme of Work
- 9 – Years Basic Education Curriculum
- Course Book
- All Relevant Material
- Online Information
CONTENT OF THE LESSON
LESSON 1 – MEANING OF SOIL
WHAT IS SOIL?
Soil is the loose, upper layer of the Earth’s surface that supports plant life. It is a mixture of tiny pieces of rock, decayed plant and animal matter, water, air, and countless living organisms.
KEY CHARACTERISTICS OF SOIL:
- Natural Resource: Found naturally on Earth’s surface
- Life Supporting: Essential for plant and animal life
- Complex Mixture: Contains many different materials
- Fertile Layer: Provides nutrients for plant growth
- Living System: Contains many living organisms
HOW SOIL IS FORMED:
Soil formation is a very slow process that takes thousands of years:
STEP 1: ROCK BREAKDOWN
- Large rocks break down into smaller pieces
- Weather (rain, wind, heat, cold) breaks rocks
- Physical and chemical processes work together
- Creates tiny rock particles
STEP 2: ORGANIC MATTER ADDITION
- Dead plants and animals decay
- Leaves, twigs, and roots decompose
- Forms humus (dark, rich organic matter)
- Adds nutrients to soil
STEP 3: MIXING PROCESS
- Rock particles mix with organic matter
- Water and air fill spaces between particles
- Living organisms (worms, bacteria) help mixing
- Creates the soil we see today
STEP 4: SOIL LAYERS DEVELOPMENT
- Different layers form over time
- Topsoil: Dark, nutrient-rich upper layer
- Subsoil: Lighter colored, less nutrients
- Bedrock: Solid rock underneath
SOIL FORMATION FACTORS:
- PARENT ROCK:
- Type of original rock affects soil type
- Different rocks create different soils
- Examples: Granite → sandy soil, Limestone → clay soil
- CLIMATE:
- Temperature and rainfall affect formation
- Hot, wet climates form soil faster
- Cold, dry climates form soil slowly
- TIME:
- Soil formation takes very long time
- Thousands to millions of years
- Older soils are usually deeper
- LIVING ORGANISMS:
- Plants and animals help create soil
- Bacteria and fungi decompose organic matter
- Earthworms mix and aerate soil
- TOPOGRAPHY:
- Slope of land affects soil formation
- Steep slopes have thin soil
- Flat areas have deep soil
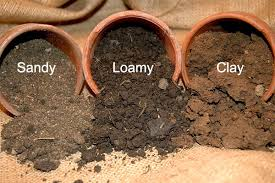
LESSON 2 – TYPES OF SOIL
There are three main types of soil, each with different characteristics and uses:
- SANDY SOIL
CHARACTERISTICS:
- Texture: Rough and gritty to touch
- Color: Usually light brown or yellow
- Particle Size: Large particles with big spaces
- Drainage: Water drains quickly (good drainage)
- Air Content: Lots of air spaces between particles
PROPERTIES:
- Easy to Dig: Soft and loose
- Quick Drainage: Water passes through quickly
- Poor Water Retention: Doesn’t hold water well
- Low Nutrients: Nutrients wash away easily
- Warms Up Quickly: Heats up fast in sun
ADVANTAGES:
- Good for crops that don’t need much water
- Easy to work with tools
- Good aeration for plant roots
- Warms up early in spring
DISADVANTAGES:
- Needs frequent watering
- Nutrients wash away easily
- Can be too dry for some plants
- Not good for water-loving plants
BEST CROPS:
- Carrots, radishes, potatoes
- Watermelons, peanuts
- Some flowers and herbs
- CLAY SOIL
CHARACTERISTICS:
- Texture: Smooth and sticky when wet
- Color: Usually dark brown, red, or gray
- Particle Size: Very small particles, tiny spaces
- Drainage: Water drains very slowly (poor drainage)
- Air Content: Few air spaces, becomes compact
PROPERTIES:
- Hard to Dig: Especially when dry or very wet
- Slow Drainage: Water stays on surface
- Good Water Retention: Holds water for long time
- Rich in Nutrients: Keeps nutrients well
- Slow to Warm: Takes time to heat up
ADVANTAGES:
- Retains water and nutrients well
- Very fertile when managed properly
- Good for water-loving plants
- Provides steady moisture to plants
DISADVANTAGES:
- Hard to dig and work with
- Can become waterlogged
- Poor aeration for roots
- Cracks when very dry
BEST CROPS:
- Rice, sugar cane, wheat
- Vegetables like cabbage, broccoli
- Fruit trees in well-drained clay
- LOAMY SOIL (BEST SOIL)
CHARACTERISTICS:
- Texture: Smooth but not sticky, feels pleasant
- Color: Usually dark brown or black
- Particle Size: Mixture of large and small particles
- Drainage: Drains well but retains moisture
- Air Content: Good balance of air and water
PROPERTIES:
- Easy to Work: Not too hard, not too soft
- Good Drainage: Water drains but some stays
- Good Water Retention: Holds enough moisture
- Rich in Nutrients: Contains good nutrients
- Perfect Temperature: Warms appropriately
COMPOSITION:
- About 40% sand particles
- About 40% silt particles
- About 20% clay particles
- Rich in organic matter (humus)
ADVANTAGES:
- Best for most plants and crops
- Easy to dig and cultivate
- Good drainage and water retention
- Rich in nutrients
- Good aeration for roots
WHY LOAMY SOIL IS BEST:
- Combines advantages of sandy and clay soils
- Eliminates most disadvantages
- Perfect balance for plant growth
- Most productive for agriculture
BEST CROPS:
- Almost all vegetables and fruits
- Grains like corn, wheat, rice
- Flowers and ornamental plants
- Trees and shrubs
SIMPLE SOIL TYPE TESTS:
FEEL TEST:
- Take soil sample in hand
- Add little water and squeeze
- Sandy: Feels gritty, doesn’t hold shape
- Clay: Feels smooth, holds shape well
- Loamy: Feels medium, holds shape but crumbles
WATER TEST:
- Put soil samples in clear jars
- Add water and let settle
- Sandy: Water clears quickly, sand settles fast
- Clay: Water stays muddy long time
- Loamy: Water clears moderately, mixed settling
LESSON 3 – SOIL CONSTITUENTS
Soil is made up of four main components that work together to support plant life:
- MINERAL PARTICLES (45%)
WHAT ARE MINERAL PARTICLES?
- Tiny pieces of broken rock
- Come from weathering of parent rock
- Form the solid framework of soil
TYPES OF MINERAL PARTICLES:
SAND PARTICLES:
- Size: Largest particles (0.05-2.0 mm)
- Feel: Gritty and rough
- Function: Provide drainage and aeration
- Visibility: Can see individual grains
SILT PARTICLES:
- Size: Medium particles (0.002-0.05 mm)
- Feel: Smooth like flour
- Function: Hold some water and nutrients
- Visibility: Need magnifying glass to see
CLAY PARTICLES:
- Size: Smallest particles (less than 0.002 mm)
- Feel: Sticky when wet, hard when dry
- Function: Hold water and nutrients
- Visibility: Cannot see individual particles
FUNCTIONS OF MINERAL PARTICLES:
- Provide structure and support for plants
- Store and release nutrients
- Control water movement
- Determine soil texture
- ORGANIC MATTER (5%)
WHAT IS ORGANIC MATTER?
- Remains of dead plants and animals
- Includes leaves, twigs, roots, insects
- In various stages of decomposition
TYPES OF ORGANIC MATTER:
FRESH ORGANIC MATTER:
- Recently fallen leaves and twigs
- Dead insects and small animals
- Fresh plant roots and stems
PARTIALLY DECOMPOSED MATTER:
- Organic matter breaking down
- Being eaten by soil organisms
- Changing color and texture
HUMUS:
- Fully decomposed organic matter
- Dark brown or black color
- Rich in nutrients
- Most valuable part of soil
FUNCTIONS OF ORGANIC MATTER:
- Provides nutrients for plants
- Improves soil structure
- Helps soil hold water
- Feeds soil organisms
- Makes soil dark and fertile
- WATER (25%)
WHAT IS SOIL WATER?
- Water that fills spaces between soil particles
- Contains dissolved nutrients (soil solution)
- Essential for plant survival
TYPES OF SOIL WATER:
GRAVITATIONAL WATER:
- Water that drains away quickly
- Moves down through soil
- Not available to plants for long
CAPILLARY WATER:
- Water held in small spaces
- Available to plant roots
- Most important for plant growth
HYGROSCOPIC WATER:
- Water tightly held to soil particles
- Not available to plants
- Always present even in “dry” soil
FUNCTIONS OF SOIL WATER:
- Dissolves nutrients for plant absorption
- Enables chemical reactions in soil
- Helps plant roots absorb nutrients
- Maintains soil life
- Transports materials through soil
- AIR (25%)
WHAT IS SOIL AIR?
- Air that fills spaces not occupied by water
- Contains oxygen, carbon dioxide, nitrogen
- Essential for root respiration
COMPOSITION OF SOIL AIR:
- Oxygen: Needed by plant roots and soil organisms
- Carbon Dioxide: Produced by root respiration
- Nitrogen: Used by some bacteria
- Water Vapor: Moisture in air form
FUNCTIONS OF SOIL AIR:
- Provides oxygen for root respiration
- Allows beneficial bacteria to live
- Enables soil chemical processes
- Prevents root rot from too much water
- Helps soil organisms survive
BALANCE OF SOIL CONSTITUENTS:
IDEAL SOIL COMPOSITION:
- 45% Mineral particles
- 25% Water
- 25% Air
- 5% Organic matter
IMPORTANCE OF BALANCE:
- All components work together
- Too much of one can be harmful
- Balance changes with weather
- Farmers try to maintain good balance
LESSON 4 – USES OF SOIL
Soil has many important uses that affect our daily lives:
- AGRICULTURAL USES
CROP PRODUCTION:
- Food Crops: Rice, corn, wheat, vegetables
- Cash Crops: Cotton, coffee, cocoa, sugar cane
- Fruit Production: Oranges, mangoes, apples
- Livestock Feed: Grass, hay, animal feed crops
IMPORTANCE:
- Provides food for entire human population
- Source of income for farmers
- Supports livestock and animals
- Foundation of food security
SOIL REQUIREMENTS FOR AGRICULTURE:
- Rich in nutrients (nitrogen, phosphorus, potassium)
- Good drainage but retains moisture
- Proper pH level (not too acidic or alkaline)
- Deep enough for root development
- Free from harmful chemicals
- CONSTRUCTION USES
BUILDING MATERIALS:
- Bricks: Made from clay soil
- Adobe: Sun-dried mud bricks
- Cement: Contains materials from soil
- Foundation Fill: Soil for building foundations
ROAD CONSTRUCTION:
- Road Base: Compacted soil layers
- Embankments: Soil for raising road levels
- Drainage: Soil for proper water flow
LANDSCAPING:
- Gardens: Soil for decorative plants
- Parks: Creating beautiful outdoor spaces
- Sports Fields: Grass fields for sports
- ENVIRONMENTAL USES
WATER FILTRATION:
- Natural Filter: Soil filters rainwater
- Groundwater Recharge: Water soaks into underground
- Pollution Control: Soil traps some pollutants
- Watershed Protection: Prevents erosion
CARBON STORAGE:
- Climate Regulation: Soil stores carbon dioxide
- Organic Matter: Dead plants store carbon
- Global Impact: Helps control climate change
HABITAT PROVISION:
- Wildlife Homes: Many animals live in soil
- Insect Life: Beetles, ants, worms
- Microorganisms: Bacteria, fungi essential for life
- INDUSTRIAL USES
POTTERY AND CERAMICS:
- Clay Products: Pots, plates, decorative items
- Traditional Crafts: Local pottery making
- Industrial Ceramics: Advanced ceramic products
MINING SUPPORT:
- Mineral Extraction: Finding valuable minerals
- Oil and Gas: Soil indicates underground resources
- Geological Studies: Understanding Earth’s history
- RECREATIONAL USES
SPORTS AND RECREATION:
- Football Fields: Grass grown in soil
- Golf Courses: Specially maintained soil
- Playgrounds: Safe soil surfaces for children
GARDENING HOBBIES:
- Home Gardens: Growing flowers and vegetables
- School Gardens: Educational gardening projects
- Community Gardens: Neighborhood food production
- WASTE MANAGEMENT
DECOMPOSITION:
- Organic Waste: Soil organisms break down waste
- Composting: Converting waste to useful soil
- Natural Recycling: Nature’s waste disposal system
LANDFILL COVER:
- Waste Burial: Soil covers garbage dumps
- Odor Control: Soil reduces bad smells
- Safety: Protects people from harmful waste
- CULTURAL AND TRADITIONAL USES
TRADITIONAL MEDICINE:
- Clay Treatments: Some cultures use clay for healing
- Mineral Supplements: Soil minerals for health
CULTURAL PRACTICES:
- Ceremonies: Soil used in traditional rituals
- Art Materials: Clay for sculptures and crafts
- Building Traditions: Traditional mud houses
LESSON 5 – SOIL FORMATION AND LAYERS
SOIL PROFILE (SOIL LAYERS)
HORIZON O (ORGANIC LAYER):
- Composition: Fresh and decomposing organic matter
- Color: Brown to black
- Thickness: Few centimeters
- Function: Provides nutrients as it decomposes
HORIZON A (TOPSOIL):
- Composition: Mineral particles mixed with humus
- Color: Dark brown to black
- Thickness: 15-30 cm typically
- Function: Most fertile layer, best for plant growth
HORIZON B (SUBSOIL):
- Composition: Mainly mineral particles, less organic matter
- Color: Lighter brown, red, or yellow
- Thickness: 30-60 cm typically
- Function: Stores nutrients leached from topsoil
HORIZON C (PARENT MATERIAL):
- Composition: Partially weathered rock
- Color: Similar to parent rock
- Thickness: Variable
- Function: Source of soil mineral particles
BEDROCK:
- Composition: Solid, unweathered rock
- Function: Foundation of soil formation
LESSON 6 – SOIL CONSERVATION
IMPORTANCE OF SOIL CONSERVATION:
WHY PROTECT SOIL:
- Limited Resource: Takes thousands of years to form
- Food Security: Essential for growing food
- Economic Value: Supports agriculture and economy
- Environmental Balance: Supports ecosystems
THREATS TO SOIL:
SOIL EROSION:
- Water Erosion: Rain washes soil away
- Wind Erosion: Wind blows soil away
- Result: Loss of fertile topsoil
SOIL POLLUTION:
- Chemical Pollution: Pesticides and fertilizers
- Industrial Waste: Harmful chemicals
- Plastic Pollution: Non-biodegradable materials
SOIL DEGRADATION:
- Overuse: Growing same crop repeatedly
- Compaction: Heavy machinery damages soil
- Deforestation: Removing trees that protect soil
PRESENTATION
To deliver the lesson, the teacher adopts the following steps:
- To introduce the lesson, the teacher takes pupils outside to observe soil around the school. Based on this, he/she asks pupils what they know about soil;
- Explains what soil is and shows different soil samples for examination;
Pupil’s Activities – Handle different soil samples, feel their texture, and describe differences between them.
- Demonstrates the three main types of soil using actual samples and simple tests;
Pupil’s Activities – Perform simple feel tests and water tests to identify soil types.
- Shows the four main constituents of soil using clear explanations and examples;
Pupil’s Activities – Examine soil samples under magnifying glass to see different particles and organic matter.
- Discusses various uses of soil with real-life examples from students’ environment;
Pupil’s Activities – Share examples of how soil is used in their homes and community.
- Demonstrates simple soil conservation methods and their importance;
Pupil’s Activities – Suggest ways they can help protect soil in their environment.
- Conducts simple soil experiments to reinforce learning;
Pupil’s Activities – Participate in soil settling test and other simple investigations.
- Summary the lesson on the board.
Pupil’s Activities – Copy as the teacher writes.
CONCLUSION
To conclude the lesson for the week, the teacher revises all soil concepts and links them to the following week’s lesson on plants and their relationship with soil.
LESSON EVALUATION/ASSIGNMENT
Ask pupils to:
- Define soil and explain how it is formed
- Compare the three types of soil and their characteristics
- List the four constituents of soil and their functions
- Give five uses of soil in daily life
- Collect soil samples from three different places and describe their differences
WORKBOOK
WEEKLY ASSESSMENT (TEST)
- Soil is the _______ layer of Earth’s surface that supports plant life. A. Lower B. Upper
- The best type of soil for growing most crops is _______ soil. A. Sandy B. Loamy
- _______ soil has the largest particles and drains quickly. A. Sandy B. Clay
- The four main constituents of soil are minerals, organic matter, _______, and air. A. Rocks B. Water
- _______ is the fully decomposed organic matter in soil. A. Humus B. Sand
- Clay soil holds _______ well but has poor drainage. A. Air B. Water
- Soil formation takes _______ of years. A. Hundreds B. Thousands
- The most fertile layer of soil is called _______. A. Subsoil B. Topsoil
- _______ is a major threat to soil caused by rain and wind. A. Erosion B. Formation
- List four uses of soil: a. _________________ b. _________________ c. _________________ d. _________________
TOPIC – TRACK EVENT: LONG DISTANCE RACES
LEARNING AREA
- Introductory Activities
- Understanding Long Distance Running
- Types of Long Distance Races (300m, 500m)
- Steeplechase in Long Distance Racing
- Standing and Starting Position
- Take-off and Pacing Techniques
- Running Form and Technique
- Arm Action for Distance Running
- Finishing Techniques
- Training and Strategy
PERFORMANCE OBJECTIVES
By the end of the lesson, most of the pupils should have attained the following objectives –
- explain the characteristics of long distance running.
- identify different types of long distance races including 300m and 500m.
- understand steeplechase as a specialized long distance event.
- demonstrate proper standing and starting positions for distance races.
- show correct take-off and pacing techniques.
- display efficient running form for sustained effort.
- execute proper arm action for distance running.
- demonstrate effective finishing techniques.
- develop basic strategies for long distance racing.
INSTRUCTIONAL MATERIALS
The teacher will teach the lesson with the aid of:
- Athletic track/field or marked running area

2.Measuring tape for distance marking
3. Stopwatch/timer for pacing practice
4. Cones or markers for course layout

5. Water bottles for hydration
6. Whistle for commands and intervals
7. Charts showing running techniques
8. Pictures/videos of steeplechase events
9. Obstacles for steeplechase practice (if available)
10. First aid kit for safety
METHOD OF TEACHING
Choose a suitable and appropriate methods for the lessons.
Note – Irrespective of choosing methods of teaching, always introduce an activities that will arouse pupil’s interest or lead them to the lessons.
REFERENCE MATERIALS
- Scheme of Work
- 9 – Years Basic Education Curriculum
- Physical Education Curriculum
- Athletics Handbook
- International Association of Athletics Federations (IAAF) Rules
- Distance Running Training Manual
- All Relevant Material
- Online Information
CONTENT OF THE LESSON
LESSON 1 – UNDERSTANDING LONG DISTANCE RUNNING
WHAT ARE LONG DISTANCE RACES?
Long distance races are running events that require sustained effort over extended distances, emphasizing endurance, pacing strategy, and efficient energy management rather than pure speed.
KEY CHARACTERISTICS OF LONG DISTANCE RUNNING:
- Endurance Focus: Requires cardiovascular fitness and stamina
- Pacing Strategy: Managing energy throughout the race
- Efficient Technique: Conserving energy through proper form
- Mental Toughness: Overcoming fatigue and discomfort
- Tactical Racing: Strategic positioning and race management
- Aerobic Energy: Primarily uses oxygen-based energy systems
DIFFERENCES FROM SPRINT RACES:
- Longer Duration: Minutes rather than seconds
- Pacing Required: Cannot run at maximum speed throughout
- Energy Systems: Aerobic vs anaerobic energy production
- Strategy Important: Tactical decisions affect outcome
- Different Training: Emphasis on endurance building
LESSON 2 – TYPES OF LONG DISTANCE RACES
CLASSIFICATION OF DISTANCE RACES:
MIDDLE DISTANCE (800m – 1500m):
- Bridge between sprints and long distance
- Combination of speed and endurance
- Tactical racing very important
LONG DISTANCE (3000m and above):
- Pure endurance events
- Pacing and strategy crucial
- Sustained effort required
SPECIFIC DISTANCE EVENTS:
300 METERS
- Classification: Extended sprint/short middle distance
- Duration: 35-45 seconds for youth athletes
- Energy System: Anaerobic lactic (speed endurance)
- Strategy: Fast start, maintain speed, strong finish
Characteristics of 300m:
- One curve and one straight (3/4 lap)
- Requires speed endurance
- Lactate tolerance important
- Strategic positioning crucial
Racing Strategy for 300m:
- First 100m: Controlled fast start (95% effort)
- Middle 100m: Maintain speed (90% effort)
- Final 100m: Fight lactate buildup, strong finish
500 METERS
- Classification: Middle distance event
- Duration: 70-90 seconds for youth athletes
- Energy System: Aerobic and anaerobic mix
- Strategy: Even pacing with tactical positioning
Characteristics of 500m:
- One and a quarter laps of track
- Requires endurance and speed
- Pacing becomes critical
- Tactical awareness needed
Racing Strategy for 500m:
- First 200m: Controlled start, good position
- Middle 200m: Settle into race pace
- Final 100m: Gradual acceleration to finish
LONGER DISTANCE EVENTS (For Reference):
800 METERS:
- Classification: Classic middle distance
- Strategy: Even pace with tactical kick
- Key Skills: Lactate tolerance, tactical awareness
1500 METERS:
- Classification: Metric mile
- Strategy: Controlled pace, positioning, finishing kick
- Key Skills: Endurance, tactical racing, speed reserve
3000 METERS:
- Classification: Long distance
- Strategy: Even pacing, sustained effort
- Key Skills: Pure endurance, mental toughness
LESSON 3 – STEEPLECHASE IN LONG DISTANCE RACING
WHAT IS STEEPLECHASE?
Steeplechase is a specialized distance running event that combines running with jumping over obstacles (barriers) and a water jump, typically run over 3000 meters.
STEEPLECHASE CHARACTERISTICS:
DISTANCE AND OBSTACLES:
- Standard Distance: 3000 meters (7.5 laps)
- Total Barriers: 28 barriers + 7 water jumps = 35 obstacles
- Barrier Height: 91.4cm for men, 76.2cm for women (youth heights vary)
- Water Jump: Barrier followed by water pit
OBSTACLE LAYOUT:
- Barriers per Lap: 4 regular barriers + 1 water jump
- Barrier Spacing: Evenly distributed around track
- Water Jump Location: Usually on inside of track
STEEPLECHASE TECHNIQUES:
BARRIER CLEARANCE:
- Approach: Maintain running rhythm
- Takeoff: Step on barrier with lead foot
- Trail Leg: Swing efficiently over barrier
- Landing: Continue running immediately
WATER JUMP TECHNIQUE:
- Barrier Step: Step on barrier with inside foot
- Water Entry: Land in water with outside foot
- Water Exit: Quick, efficient exit from water
- Rhythm Return: Resume normal running quickly
PACING STRATEGY:
- Early Race: Conservative pace, focus on obstacles
- Middle Race: Settle into rhythm with barriers
- Final Kilometers: Maintain form as fatigue increases
- Last 400m: Racing tactics while managing obstacles
TRAINING FOR STEEPLECHASE:
SKILL DEVELOPMENT:
- Practice barrier technique regularly
- Water jump specific training
- Rhythm maintenance over obstacles
- Flexibility and coordination work
FITNESS REQUIREMENTS:
- Endurance Base: Like other distance events
- Power: For efficient barrier clearance
- Coordination: Combining running and jumping
- Mental Toughness: Additional complexity increases difficulty
LESSON 4 – STANDING AND STARTING POSITION
Unlike sprints, long distance races typically use a standing start rather than starting blocks.
STANDING START TECHNIQUE:
STARTING POSITION:
- Feet Placement: Shoulder-width apart
- Stance: Comfortable, relaxed position
- Body Position: Slight forward lean
- Arms: Relaxed at sides
- Eyes: Looking ahead at track
STARTING COMMANDS:
“RUNNERS TO YOUR MARKS”:
- Move to starting line
- Find comfortable position
- Prepare mentally for race
“SET” (Optional in distance races):
- Take ready position
- Slight crouch if used
- Focus on start
GUN/WHISTLE:
- Begin race with controlled effort
- Avoid going out too fast
- Focus on positioning and pace
STARTING STRATEGY:
POSITIONING:
- Lane Assignment: May start in lanes for first curve
- Strategic Position: Inside lane preferred for distance
- Avoid Trouble: Stay clear of potential crowding
EFFORT LEVEL:
- Controlled Start: 80-85% of maximum effort
- Avoid Early Lead: Usually not beneficial in distance races
- Good Position: Top third of field typically ideal
FIRST 100-200 METERS:
- Settle In: Find sustainable pace quickly
- Positioning: Establish good racing position
- Relax: Stay calm and controlled
- Assess Field: Be aware of other runners
LESSON 5 – TAKE-OFF AND PACING TECHNIQUES
TAKE-OFF (RACE START):
ACCELERATION PHASE:
- Gradual Build: Unlike sprints, build speed gradually
- Smooth Transition: From standing to running pace
- Avoid Rushing: Don’t panic in early positioning
- Find Rhythm: Establish sustainable rhythm quickly
POSITIONING STRATEGY:
- Inside Lane: Try to secure inside position
- Avoid Boxes: Don’t get trapped behind slower runners
- Stay Alert: Watch for gaps and opportunities
- Be Patient: Early race positioning less critical than sprints
PACING TECHNIQUES:
UNDERSTANDING PACE:
- Even Pace: Maintaining consistent speed throughout
- Negative Split: Running second half faster than first
- Positive Split: Running first half faster than second
- Variable Pace: Changing speed based on tactics
PACING STRATEGIES:
EVEN PACE STRATEGY (RECOMMENDED FOR BEGINNERS):
- Goal: Run each segment at same speed
- Benefits: Energy conservation, predictable race
- Method: Use time markers, internal rhythm
- Best For: 800m and longer distances
TACTICAL PACING:
- Early Conservative: Start slower, finish faster
- Middle Surge: Increase pace mid-race
- Respond to Moves: React to competitors’ changes
- Final Kick: Save energy for strong finish
PACE JUDGMENT SKILLS:
INTERNAL MONITORING:
- Breathing Pattern: Monitor breathing rhythm
- Effort Level: Assess subjective effort (1-10 scale)
- Muscle Tension: Stay relaxed and efficient
- Heart Rate: Learn to sense heart rate levels
EXTERNAL MARKERS:
- Split Times: Use lap times to monitor pace
- Competition: Use other runners as pace guides
- Track Markers: Use 100m marks for timing
- Coach Signals: Listen for pace feedback
LESSON 6 – RUNNING FORM AND TECHNIQUE
Efficient running form is crucial for distance running to conserve energy over extended periods.
DISTANCE RUNNING FORM:
BODY POSITION:
- Posture: Upright with slight forward lean
- Head: Up, eyes looking ahead 10-20 meters
- Shoulders: Relaxed, not hunched
- Core: Engaged but not tense
- Overall: Smooth, efficient movement
FOOT STRIKE:
- Contact Point: Midfoot or forefoot preferred
- Ground Time: Minimal ground contact time
- Cadence: 180-190 steps per minute ideal
- Sound: Quiet, efficient foot placement
STRIDE CHARACTERISTICS:
- Length: Moderate stride, not overstriding
- Frequency: Higher turnover rather than longer steps
- Efficiency: Maximum distance with minimum energy
- Adaptability: Adjust to terrain and pace changes
BREATHING TECHNIQUE:
BREATHING PATTERN:
- Rhythm: Coordinate with running rhythm
- Depth: Deep, controlled breathing
- Method: Both nose and mouth for oxygen intake
- Relaxation: Keep breathing smooth and calm
COMMON BREATHING PATTERNS:
- 3:2 Pattern: 3 steps inhale, 2 steps exhale
- 2:2 Pattern: 2 steps inhale, 2 steps exhale (higher intensity)
- Natural: Let breathing find natural rhythm
- Recovery: Deeper breathing during recovery periods
ENERGY CONSERVATION:
EFFICIENCY PRINCIPLES:
- Minimize Vertical Oscillation: Reduce up-down movement
- Forward Momentum: Direct energy forward
- Relaxation: Stay loose in non-essential muscles
- Rhythm: Maintain consistent rhythm
COMMON FORM ERRORS:
- Overstriding: Taking steps too long
- Heel Striking: Landing on heels heavily
- Tension: Carrying unnecessary muscle tension
- Poor Posture: Leaning too far forward or backward
LESSON 7 – ARM ACTION FOR DISTANCE RUNNING
Proper arm action contributes significantly to running efficiency and balance in distance events.
DISTANCE RUNNING ARM TECHNIQUE:
ARM POSITION:
- Angle: Arms bent at approximately 90 degrees
- Hand Position: Relaxed, lightly cupped
- Shoulder Position: Relaxed, not elevated
- Elbow Position: Close to body, not flaring out
ARM MOVEMENT:
- Direction: Forward and backward, not across body
- Range: Moderate swing, not excessive
- Rhythm: Coordinate with leg movement
- Efficiency: Smooth, controlled movement
HAND POSITION:
- Fingers: Lightly closed, not clenched fists
- Thumbs: Resting on top of fingers
- Wrists: Neutral position, not bent
- Tension: Minimal, relaxed grip
ARM ACTION FUNCTIONS:
BALANCE AND COORDINATION:
- Counterbalance: Arms balance leg movement
- Stability: Help maintain upright posture
- Rhythm: Assist in maintaining consistent rhythm
- Direction: Help maintain straight running line
ENERGY EFFICIENCY:
- Momentum: Contribute to forward momentum
- Reduced Rotation: Prevent excessive body rotation
- Power Transfer: Help transfer power through kinetic chain
- Endurance: Efficient arms reduce overall energy cost
DISTANCE VS SPRINT ARM ACTION:
DISTANCE RUNNING ARMS:
- More Relaxed: Less aggressive action
- Energy Conservation: Focus on efficiency over power
- Consistent: Maintain same action throughout race
- Sustainable: Must work for extended periods
COMPARED TO SPRINTING:
- Less Power: Not driving for maximum speed
- More Endurance: Must function for minutes/hours
- Different Angle: May be slightly more acute
- Relaxation Priority: Relaxation more important than power
LESSON 8 – FINISHING TECHNIQUES
The finish in distance races requires different tactics and techniques compared to sprints.
APPROACHING THE FINISH:
FINAL 400 METERS:
- Assessment: Evaluate position and remaining energy
- Positioning: Move to good tactical position
- Preparation: Prepare for final effort
- Stay Alert: Watch for moves by competitors
FINAL 200 METERS:
- Decision Point: Commit to finishing strategy
- Acceleration: Begin gradual acceleration if possible
- Form Focus: Maintain good running form
- Mental Preparation: Prepare for discomfort
FINAL 100 METERS:
- Full Commitment: Give maximum available effort
- Form Maintenance: Fight to maintain technique
- Drive: Use arms to assist final push
- Run Through: Continue effort past finish line
FINISHING STRATEGIES:
KICK FINISH:
- Energy Reserve: Save energy for strong finish
- Timing: Begin kick at optimal distance
- Acceleration: Gradual then rapid speed increase
- Best For: Runners with good speed reserve
SUSTAINED EFFORT:
- Even Pressure: Maintain consistent effort
- Form Focus: Emphasize technique maintenance
- Mental Toughness: Fight through fatigue
- Best For: Runners with superior endurance
TACTICAL FINISH:
- Respond to Competition: React to others’ moves
- Positioning: Use tactical positioning
- Wait and Respond: Time final move precisely
- Best For: Experienced tactical runners
FINISHING FORM:
BODY POSITION:
- Maintain Posture: Keep upright posture
- Head Position: Keep head up, drive with eyes
- Arm Drive: Increase arm action slightly
- Leg Drive: Focus on maintaining leg turnover
COMMON FINISHING ERRORS:
- Too Early: Starting kick too far from finish
- Form Breakdown: Losing technique under fatigue
- Giving Up: Mentally quitting before finish
- Poor Positioning: Being in wrong tactical position
LESSON 9 – RACE STRATEGY AND TACTICS
PRE-RACE PREPARATION:
RACE PLANNING:
- Know the Distance: Understand specific event demands
- Study Competition: Know other runners’ strengths
- Plan Strategy: Decide on pacing and tactics
- Prepare Mentally: Visualize race scenarios
WARM-UP PROTOCOL:
- Easy Jogging: 10-15 minutes easy running
- Dynamic Stretching: Leg swings, arm circles
- Strides: 4-6 × 50m accelerations
- Mental Preparation: Focus and visualization
DURING THE RACE:
RACE MANAGEMENT:
- Stay Calm: Don’t panic with early moves
- Monitor Effort: Check in with effort level regularly
- Tactical Awareness: Watch other runners
- Adapt: Adjust strategy based on race development
PROBLEM SOLVING:
- Getting Boxed In: Patience and tactical movement
- Going Out Too Fast: Settle and try to recover
- Falling Behind: Gradual move back to contention
- Unexpected Surges: Decide whether to respond
POST-RACE:
COOL-DOWN:
- Easy Jogging: 10-15 minutes easy pace
- Stretching: Static stretching for major muscles
- Hydration: Replace fluids lost during race
- Recovery: Begin recovery process immediately
RACE ANALYSIS:
- Evaluate Performance: Compare to goals and expectations
- Learn Lessons: Identify what worked and what didn’t
- Plan Improvements: Set goals for future races
- Celebrate Success: Acknowledge achievements
PRESENTATION
To deliver the lesson, the teacher adopts the following steps:
- To introduce the lesson, the teacher revises previous lessons on sprint racing. Based on this, he/she asks pupils about the differences between running fast for short distances versus longer distances;
- Explains what long distance running is and demonstrates the difference in pacing compared to sprints;
Pupil’s Activities – Practice walking at different speeds to understand pace control and energy management.
- Teaches the specific distances (300m and 500m) and their characteristics;
Pupil’s Activities – Walk/jog the specific distances to understand the length and time involved.
- Introduces steeplechase concept with simple obstacle demonstration;
Pupil’s Activities – Practice stepping over low obstacles and maintaining running rhythm.
- Demonstrates proper standing start and take-off for distance races;
Pupil’s Activities – Practice standing starts with controlled acceleration and proper positioning.
- Shows efficient distance running form and arm action;
Pupil’s Activities – Practice distance running form over short segments, focusing on technique.
- Teaches finishing techniques and race strategy concepts;
Pupil’s Activities – Practice finishing techniques over 50-100m segments with different strategies.
- Organizes practice races over appropriate distances with emphasis on pacing;
Pupil’s Activities – Participate in 200-400m practice races focusing on even pacing and technique.
CONCLUSION
To conclude the lesson for the week, the teacher revises all long distance running concepts and links them to the following week’s lesson on endurance training methods.
LESSON EVALUATION
Asks pupils to:
- Explain the differences between long distance and sprint racing
- Demonstrate proper standing start for distance races
- Show efficient distance running form over 100 meters
- Practice pacing by running 200m at even effort
- Display understanding of basic race strategy concepts
WORKBOOK
WEEKLY ASSESSMENT (TEST)
- Long distance races emphasize _______ over pure speed. A. Jumping B. Endurance
- A 300m race is approximately _______ of a standard track. A. 3/4 lap B. 1/2 lap
- Steeplechase combines running with jumping over _______. A. Hurdles B. Barriers and water
- Distance races typically use a _______ start. A. Standing B. Block
- _______ is maintaining consistent speed throughout a race. A. Even pacing B. Sprint finish
- In distance running, arms should be bent at approximately _______ degrees. A. 90 B. 180
- The _______ is a specialized distance event with obstacles. A. Steeplechase B. Marathon
- Distance running requires primarily _______ energy systems. A. Anaerobic B. Aerobic
- A strong _______ at the end of a race is called a kick. A. Start B. Finish
- List the five main techniques covered in long distance racing: a. _________________ b. _________________ c. _________________ d. _________________ e. _________________
TOPIC: TYPING AND SAVING ON MICROSOFT POWERPOINT
LEARNING AREA
- Introductory Activities
- Understanding PowerPoint Text Entry
- Types of Text Placeholders
- Basic Typing in PowerPoint
- Text Formatting Basics
- Saving PowerPoint Presentations
- Different Save Options
- File Management and Organization
- Practical Typing and Saving Exercises
PERFORMANCE OBJECTIVES
By the end of this Module, Pupils should be able to:
- Identify different text placeholders in PowerPoint slides.
- Type text effectively in title and content placeholders.
- Apply basic text formatting (font, size, color, style).
- Save PowerPoint presentations using different methods.
- Use various save options (Save, Save As, Save Copy).
- Organize and manage PowerPoint files properly.
- Create and save simple presentations with text content.
TEACHING AND LEARNING MATERIALS
- Computer system/Laptop

- Microsoft PowerPoint software

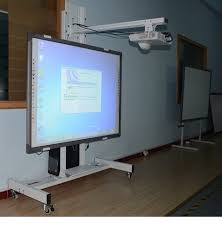
- Projector/Interactive whiteboard
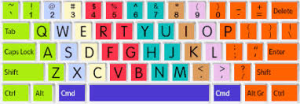
- Keyboard for typing practice
- Sample text for typing exercises
- External storage devices (USB flash drive)

- Charts showing PowerPoint interface
- Printed handouts with typing exercises
- File management examples
TEACHING AND LEARNING METHOD
- Explanation
- Demonstration
- Hands-on practice
- Step-by-step guidance
- Individual exercises
- Questions and Answers
REFERENCE MATERIALS
- Universal Basic Education Curriculum.
- NERDC Basic Education Curriculum for primary schools.
- Lagos State Scheme of work
- Unified Schemes of Work Primary Schools for Computer Studies (MIDDLE BASIC)
- Internet Materials.
ENTRY BEHAVIOUR/ PREVIOUS LESSON
The students are familiar with launching PowerPoint, basic interface components, and fundamental keyboard skills.
WORD FILE
Typing, text, placeholder, formatting, saving, file, presentation, slides.
CONTENT
Understanding PowerPoint Text Entry
Microsoft PowerPoint uses a placeholder system for adding text to slides. Placeholders are pre-designed areas where you can easily add text, images, or other content.
WHAT ARE PLACEHOLDERS?
- Pre-designed boxes on slides
- Show where to add content
- Provide structure and layout
- Make slide creation easier
- Maintain consistent formatting
LESSON 1 – TYPES OF TEXT PLACEHOLDERS
MAIN TEXT PLACEHOLDERS:
- TITLE PLACEHOLDER
- Location: Usually at the top of slide
- Purpose: For slide titles and main headings
- Default Text: “Click to add title”
- Formatting: Large font, bold, prominent
- SUBTITLE PLACEHOLDER
- Location: Below title placeholder
- Purpose: For secondary information or subtitles
- Default Text: “Click to add subtitle”
- Formatting: Smaller than title, less prominent
- CONTENT PLACEHOLDER
- Location: Main body area of slide
- Purpose: For bullet points, paragraphs, lists
- Default Text: “Click to add text”
- Formatting: Standard text size, bullet points
- TEXT BOX
- Location: Anywhere on slide (user-created)
- Purpose: For additional text not in placeholders
- Creation: Insert → Text Box
- Formatting: Customizable positioning and size
IDENTIFYING PLACEHOLDERS:
VISUAL INDICATORS:
- Dotted Border: Shows placeholder boundaries
- Click Prompt: “Click to add…” instructions
- Sizing Handles: Small squares around border
- Cursor Change: Pointer becomes text cursor when hovering
PLACEHOLDER STATES:
- Inactive: Shows prompt text
- Active: Ready for text input (cursor visible)
- Selected: Entire placeholder highlighted
- Editing: Text cursor inside, ready to type
LESSON 2 – BASIC TYPING IN POWERPOINT
STARTING TO TYPE:
STEP 1: CLICK IN PLACEHOLDER
- Position mouse pointer over desired placeholder
- Click once inside the placeholder
- Placeholder becomes active (cursor appears)
- Prompt text disappears
- Begin typing
STEP 2: ENTER TEXT
- Type desired text using keyboard
- Text appears where cursor is located
- Text automatically wraps to next line if needed
- Use Enter key to create new lines manually
STEP 3: FINISH TYPING
- Click outside placeholder to finish
- Or press Escape key
- Or click in another placeholder
- Text is saved automatically
TYPING IN DIFFERENT PLACEHOLDERS:
TYPING IN TITLE PLACEHOLDER:
- Click in title area
- Type slide title (keep brief and clear)
- Avoid using all capital letters
- Make title descriptive of slide content
Example Title Typing:
- Good: “Introduction to Animals”
- Good: “Types of Weather”
- Avoid: “INTRODUCTION TO ANIMALS”
- Avoid: Very long titles that wrap multiple lines
TYPING IN CONTENT PLACEHOLDER:
- Click in content area
- Type main content
- Press Enter for new bullet points
- Use Tab to create sub-bullets
- Use Shift+Tab to reduce bullet level
Example Content Typing:
– First main point
– Supporting detail
– Another detail
– Second main point
– Third main point
KEYBOARD SHORTCUTS FOR TYPING:
BASIC SHORTCUTS:
- Ctrl + A: Select all text
- Ctrl + C: Copy selected text
- Ctrl + V: Paste copied text
- Ctrl + X: Cut selected text
- Ctrl + Z: Undo last action
- Ctrl + Y: Redo last action
FORMATTING SHORTCUTS:
- Ctrl + B: Bold text
- Ctrl + I: Italic text
- Ctrl + U: Underline text
- Ctrl + Shift + >: Increase font size
- Ctrl + Shift + <: Decrease font size
LESSON 3 – TEXT FORMATTING BASICS
SELECTING TEXT FOR FORMATTING:
SELECTION METHODS:
- Click and Drag: Click at start, drag to end
- Double-Click: Selects entire word
- Triple-Click: Selects entire paragraph
- Ctrl + A: Selects all text in placeholder
VISUAL FEEDBACK:
- Selected text appears highlighted
- Usually blue or gray background
- Shows what will be affected by formatting
BASIC FORMATTING OPTIONS:
FONT FORMATTING:
- FONT TYPE (TYPEFACE)
- Location: Home tab → Font group
- Common Fonts: Arial, Calibri, Times New Roman
- Purpose: Changes overall text appearance
- Recommendation: Use clear, readable fonts
- FONT SIZE
- Location: Home tab → Font group
- Measurement: Points (pt)
- Common Sizes:
- Title: 36-44 pt
- Content: 18-24 pt
- Subtitle: 20-28 pt
- FONT COLOR
- Location: Home tab → Font group → Font Color
- Options: Standard colors, theme colors, custom colors
- Consideration: Ensure good contrast with background
- FONT STYLES
- Bold: Makes text thicker and darker
- Italic: Slants text to the right
- Underline: Adds line under text
- Combinations: Can use multiple styles together
FORMATTING STEPS:
TO CHANGE FONT:
- Select text to format
- Click Home tab
- Click Font dropdown arrow
- Choose desired font from list
- Text changes immediately
TO CHANGE SIZE:
- Select text to format
- Click Home tab
- Click Font Size dropdown
- Choose size from list
- Or type custom size in box
TO CHANGE COLOR:
- Select text to format
- Click Home tab
- Click Font Color dropdown arrow
- Choose color from palette
- Text color changes immediately
TO APPLY STYLES:
- Select text to format
- Click appropriate button:
- B for Bold
- I for Italic
- U for Underline
- Style applies immediately
LESSON 4 – SAVING POWERPOINT PRESENTATIONS
Saving your work is crucial to prevent losing your presentation and to be able to access it later.
UNDERSTANDING SAVE vs SAVE AS:
SAVE (Ctrl + S):
- Use When: Working on existing file
- Function: Updates current file with changes
- No Dialog: Saves immediately
- Same Location: Keeps same filename and location
SAVE AS:
- Use When: Creating new file or changing location/name
- Function: Creates new file or saves with different name
- Dialog Opens: Shows save options
- New File: Can create copy with different name
FIRST TIME SAVING (SAVE AS):
STEP 1: ACCESS SAVE AS
- Method 1: Click File tab → Save As
- Method 2: Press F12 key
- Method 3: Press Ctrl + Shift + S
STEP 2: CHOOSE LOCATION
- This PC: Save to local computer
- OneDrive: Save to cloud storage
- Desktop: Quick access location
- Documents: Default documents folder
- Browse: Navigate to specific folder
STEP 3: ENTER FILENAME
- Type descriptive filename
- Avoid special characters (/ \ : * ? ” < > |)
- Use clear, meaningful names
- Example: “Science Presentation Chapter 1”
STEP 4: CHOOSE FILE TYPE
- PowerPoint Presentation (.pptx): Default format
- PowerPoint 97-2003 (.ppt): Older format
- PDF: For sharing/viewing only
- PowerPoint Template: For reusable templates
STEP 5: CLICK SAVE
- Click Save button
- File is saved to chosen location
- Title bar shows new filename
SUBSEQUENT SAVES:
USING CTRL + S:
- Press Ctrl + S while working
- File saves immediately
- No dialog box appears
- Changes are updated to existing file
USING SAVE BUTTON:
- Click File tab
- Click Save
- Or use Save button in Quick Access Toolbar
- File saves with current name and location
LESSON 5 – DIFFERENT SAVE OPTIONS
SAVE OPTIONS EXPLAINED:
- SAVE
- Purpose: Update existing file
- When to Use: Regular saving while working
- Shortcut: Ctrl + S
- Result: Same file, updated content
- SAVE AS
- Purpose: Create new file or change name/location
- When to Use: First save, creating copies, changing names
- Shortcut: F12
- Result: New file created
- SAVE A COPY
- Purpose: Create duplicate while keeping original open
- When to Use: Making backup or alternate version
- Access: File tab → Save a Copy
- Result: Copy created, original stays open
- EXPORT OPTIONS
- Purpose: Save in different formats
- Access: File tab → Export
- Options: PDF, Video, Images
- Use: Sharing in non-PowerPoint formats
SAVE LOCATIONS:
LOCAL STORAGE:
- Desktop: Easy to find, temporary storage
- Documents: Organized, permanent storage
- Specific Folders: Subject-organized folders
- External Drives: USB drives, external hard drives
CLOUD STORAGE:
- OneDrive: Microsoft’s cloud service
- Benefits: Access from anywhere, automatic backup
- Requirements: Internet connection, Microsoft account
- Sync: Files sync across devices
FILE NAMING BEST PRACTICES:
GOOD NAMING CONVENTIONS:
- Descriptive: “Math Lesson Fractions”
- Date Included: “Science Project 2024”
- Version Numbers: “Report v1”, “Report v2”
- Subject Codes: “ENG101 Essay Draft”
AVOID:
- Special Characters: / \ : * ? ” < > |
- Very Long Names: Keep under 255 characters
- Confusing Names: “untitled1”, “new presentation”
- Generic Names: “slide1”, “presentation”
LESSON 6 – FILE MANAGEMENT AND ORGANIZATION
ORGANIZING PRESENTATIONS:
FOLDER STRUCTURE:
My Documents/
├── School Presentations/
│ ├── Mathematics/
│ ├── Science/
│ ├── English/
│ └── Social Studies/
├── Personal Projects/
└── Templates/
BENEFITS OF ORGANIZATION:
- Easy Finding: Locate files quickly
- Better Backup: Organized backup procedures
- Space Management: Monitor storage usage
- Version Control: Track different versions
FILE MANAGEMENT TIPS:
REGULAR MAINTENANCE:
- Clean Up: Delete unnecessary files regularly
- Backup: Create copies of important presentations
- Update: Keep file names current and relevant
- Archive: Move old files to archive folders
VERSION MANAGEMENT:
- Naming: Use version numbers (v1, v2, Final)
- Dating: Include dates in filenames
- Backup: Keep previous versions as backup
- Final: Clearly mark final versions
LESSON 7 – PRACTICAL EXERCISES
EXERCISE 1: BASIC TYPING PRACTICE
Task: Create a simple presentation about yourself
- Open new blank presentation
- Click in title placeholder
- Type “About Me”
- Click in content placeholder
- Type three facts about yourself:
- Your name
- Your favorite subject
- Your hobby
EXERCISE 2: FORMATTING PRACTICE
Task: Format the “About Me” presentation
- Select title text
- Change font to Arial
- Change size to 40
- Make it bold
- Change color to blue
- Format content text as needed
EXERCISE 3: SAVE PRACTICE
Task: Save your presentation
- Use Save As (F12)
- Navigate to Documents folder
- Name file “About Me Presentation”
- Save as PowerPoint Presentation
- Practice regular saving (Ctrl + S)
EXERCISE 4: MULTIPLE SLIDES
Task: Add second slide with different content
- Insert new slide (Home → New Slide)
- Add title “My Favorite Things”
- Add content list:
- Favorite food
- Favorite color
- Favorite game
- Save changes
LESSON 8 – TROUBLESHOOTING COMMON ISSUES
TYPING PROBLEMS:
Can’t Click in Placeholder:
- Solution: Make sure you’re clicking inside the dotted border
- Check: Ensure slide is not in Slide Show mode
Text Too Small/Large:
- Solution: Select text and change font size
- Prevention: Check default font sizes for slide layouts
Text Not Appearing:
- Solution: Check if text color matches background
- Fix: Change text color for better contrast
SAVING PROBLEMS:
Can’t Save File:
- Check: Ensure you have write permissions to folder
- Try: Save to different location (Desktop)
- Solution: Close other programs if memory is low
File Won’t Open:
- Check: Ensure you have PowerPoint installed
- Try: Open from within PowerPoint (File → Open)
- Compatibility: Check if file is corrupted
Lost Work:
- Prevention: Save regularly (every 5-10 minutes)
- Recovery: Check AutoRecover files (File → Info → Manage Presentation)
- Backup: Use cloud storage for automatic backup
PRESENTATION
- The Teacher revises the previous lesson (POWERPOINT INTERFACE).
- The teacher introduces the topic: TYPING AND SAVING ON MICROSOFT POWERPOINT
- She/he demonstrates different types of text placeholders and their purposes.
- She/he shows how to click in placeholders and begin typing text.
- She/he demonstrates basic text formatting options and techniques.
- Teacher guides pupils through the saving process step by step.
- She/he shows different save options and when to use each.
- Teacher provides hands-on practice with typing and saving exercises.
STUDENT ACTIVITIES
The students practice typing in different placeholders, apply basic formatting, and save their presentations using various methods.
EVALUATIVE ACTIVITIES
- Identify different types of text placeholders in PowerPoint.
- Type text in title and content placeholders.
- Apply basic formatting to text (font, size, color, bold).
- Save a presentation using Save As with appropriate filename.
- Demonstrate regular saving using Ctrl + S.
CONCLUSION
The teacher sums up the lesson by emphasizing the importance of regular saving and proper text entry techniques in PowerPoint.
LESSON EVALUATION/ASSIGNMENT
Ask pupils to:
- Create a 3-slide presentation about their school
- Use appropriate titles and content for each slide
- Apply different formatting to make text attractive
- Save the presentation with proper filename
- Practice using keyboard shortcuts for common operations
WORKBOOK
WEEKLY ASSESSMENT (TEST)
- Text placeholders show _______ text when not active. A. Invisible B. Prompt
- To begin typing in a placeholder, you must _______ inside it. A. Double-click B. Click
- The _______ key combination saves your presentation. A. Ctrl + S B. Ctrl + P
- _______ creates a new file or saves with different name. A. Save B. Save As
- The title placeholder is usually located at the _______ of the slide. A. Bottom B. Top
- To make text bold, use _______ key combination. A. Ctrl + B B. Ctrl + I
- PowerPoint presentations are saved with _______ file extension. A. .pptx B. .docx
- To create a new bullet point, press the _______ key. A. Tab B. Enter
- Font size is measured in _______. A. Points B. Inches
- List four types of text formatting: a. _________________ b. _________________ c. _________________ d. _________________
Second Term Basic Science Lesson Notes for Other Topics

Water - Packaged Water
Explore lesson notes covering all topics.

Soil I - Importance To Plants
Explore lesson notes covering all topics.

Soil II - Importance To Animals
Explore lesson notes covering all topics.

Air In Motion I - Wind
Explore lesson notes covering all topics.

Air In Motion II - Harmful Effects Of Wind
Explore lesson notes covering all topics.

Water
Explore lesson notes covering all topics.

Qualities Of Water
Explore lesson notes covering all topics.

Water - Purifying Water
Explore lesson notes covering all topics.
Animals - Common Uses
Explore lesson notes covering all topics.

Animals
Explore lesson notes covering all topics.

Plants - Common Uses
Explore lesson notes covering all topics.

Plants
Explore lesson notes covering all topics.

Clay - Practical
Explore lesson notes covering all topics.

Loamy Soil
Explore lesson notes covering all topics.

Clay Soil
Explore lesson notes covering all topics.
Lesson Notes for Other Classes

Basic 2 Lesson Note
The complete lesson note to guide your studies.
Basic 3 Lesson Note
The complete lesson note to guide your studies.

Basic 5 Lesson Note
The complete lesson note to guide your studies.

JSS1 Lesson Note
The complete lesson note to guide your studies.

JSS2 Lesson Note
The complete lesson note to guide your studies.

JSS3 Lesson Note
The complete lesson note to guide your studies.