Soil (II): Track Event, And Typing And Saving On Microsoft Powerpoint. Basic 4 Basic Science Lesson Note
Download Lesson NoteTopic: Soil (II): Track Event, And Typing And Saving On Microsoft Powerpoint.
TOPIC: SOIL (II) GROWING OF PLANTS
LEARNING AREA
- Introductory Activities
- Understanding the Relationship Between Soil and Plants
- Soil Preparation for Plant Growth
- Tools and Equipment for Soil Preparation
- Steps in Soil Preparation
- Soil Testing and Improvement
- Planting and Early Plant Care
- Practical Soil Preparation Activities
PERFORMANCE OBJECTIVES
By the end of the lesson, the pupils should have attained the following objectives (cognitive, affective and psychomotor) and be able to –
- explain the relationship between soil and plant growth.
- understand the importance of soil preparation for successful plant growth.
- identify tools and equipment used for soil preparation.
- demonstrate the steps involved in preparing soil for planting.
- perform simple soil tests to determine soil quality.
- prepare soil beds for planting different types of plants.
- apply appropriate soil improvement techniques.
- appreciate the importance of proper soil preparation in agriculture.
ENTRY BEHAVIOR
The pupils understand the basic properties of soil, types of soil, and constituents of soil from the previous lesson.
INSTRUCTIONAL MATERIALS
The teacher will teach the lesson with the aid of:
- Small garden plots or containers for demonstration
- Basic gardening tools (hoe, spade, rake, watering can)

- Different soil samples (sandy, clay, loamy)

- Organic matter (compost, dried leaves, grass cuttings)
- Seeds for planting demonstration
- pH testing kit or strips (simple version)
- Measuring tape and rulers
- Water for irrigation demonstration

- Charts showing soil preparation steps
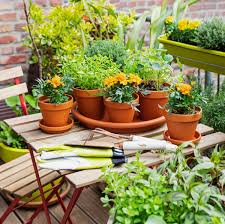
- Pictures of well-prepared garden beds

- Fertilizer samples (organic and inorganic)
METHOD OF TEACHING
Choose suitable and appropriate methods for the lessons.
Note – Irrespective of choosing methods of teaching, always introduce an activity that will arouse pupil’s interest or lead them to the lessons.
REFERENCE MATERIALS
- Scheme of Work
- 9 – Years Basic Education Curriculum
- Course Book
- Agricultural Science Textbooks
- Gardening Manuals
- All Relevant Material
- Online Information
CONTENT OF THE LESSON
LESSON 1 – UNDERSTANDING THE RELATIONSHIP BETWEEN SOIL AND PLANTS
WHY DO PLANTS NEED SOIL?
Soil provides everything plants need to grow healthy and strong. Understanding this relationship is crucial for successful gardening and farming.
WHAT PLANTS GET FROM SOIL:
- NUTRIENTS
- Primary Nutrients: Nitrogen (N), Phosphorus (P), Potassium (K)
- Secondary Nutrients: Calcium, Magnesium, Sulfur
- Micronutrients: Iron, Zinc, Copper, Boron (needed in small amounts)
- Function: Like vitamins for plants, essential for growth
- WATER
- Source: Rainwater and irrigation stored in soil
- Transport: Moves nutrients from soil to plant roots
- Plant Processes: Photosynthesis, cooling, structure
- Storage: Soil acts like a reservoir for plants
- PHYSICAL SUPPORT
- Root Anchorage: Soil holds plant roots firmly
- Stability: Prevents plants from falling over
- Root Growth: Provides space for root development
- Foundation: Like a foundation for a building
- AIR (OXYGEN)
- Root Breathing: Plant roots need oxygen to survive
- Soil Spaces: Air fills spaces between soil particles
- Drainage: Proper drainage prevents waterlogging
- Soil Life: Beneficial soil organisms need oxygen
HOW PLANTS AFFECT SOIL:
POSITIVE EFFECTS:
- Organic Matter: Dead roots and leaves add nutrients
- Soil Structure: Roots help bind soil particles together
- Erosion Control: Plant roots hold soil in place
- Soil Life: Plants feed beneficial soil organisms
PLANT-SOIL PARTNERSHIP:
- Plants and soil work together
- Healthy soil = healthy plants
- Healthy plants = improved soil
- Continuous cycle of mutual benefit
SIGNS OF GOOD PLANT-SOIL RELATIONSHIP:
HEALTHY PLANTS SHOW:
- Green Color: Rich green leaves (good nitrogen)
- Strong Growth: Steady growth rate
- Good Root System: White, spreading roots
- Disease Resistance: Fewer pest and disease problems
- Good Yield: Plenty of fruits, flowers, or vegetables
HEALTHY SOIL SHOWS:
- Good Structure: Crumbly, not too hard or sticky
- Rich Color: Dark brown or black (organic matter)
- Earthworms: Presence of beneficial organisms
- Good Drainage: Water soaks in but doesn’t puddle
- Sweet Smell: Fresh, earthy odor
LESSON 2 – IMPORTANCE OF SOIL PREPARATION
WHAT IS SOIL PREPARATION?
Soil preparation is the process of getting soil ready for planting by improving its physical, chemical, and biological properties to create the best possible growing environment for plants.
WHY PREPARE SOIL?
- IMPROVE SOIL STRUCTURE
- Break Up Compaction: Loosen hard, packed soil
- Improve Drainage: Allow water to move freely
- Increase Air Spaces: Provide oxygen for roots
- Better Root Penetration: Roots can spread easily
- ADD NUTRIENTS
- Correct Deficiencies: Add missing nutrients
- Organic Matter: Improve soil fertility naturally
- pH Adjustment: Make soil more suitable for plants
- Long-term Fertility: Build soil health over time
- CONTROL WEEDS
- Remove Existing Weeds: Eliminate competition
- Prevent Future Weeds: Disturb weed seeds
- Clean Start: Give planted crops advantage
- Easier Maintenance: Reduce future weeding work
- IMPROVE WATER MANAGEMENT
- Better Infiltration: Water soaks in easily
- Reduced Runoff: Less water waste
- Moisture Retention: Soil holds water longer
- Prevent Waterlogging: Excess water drains away
CONSEQUENCES OF POOR SOIL PREPARATION:
PLANT PROBLEMS:
- Stunted Growth: Plants grow slowly or poorly
- Poor Root Development: Roots can’t spread properly
- Nutrient Deficiency: Plants can’t access nutrients
- Disease Susceptibility: Weak plants get sick easily
- Low Yield: Poor harvest of fruits/vegetables
SOIL PROBLEMS:
- Continued Compaction: Soil stays hard
- Poor Drainage: Water stands on surface
- Erosion: Soil washes away easily
- Weed Problems: Weeds outcompete crops
- Fertility Loss: Nutrients become unavailable
LESSON 3 – TOOLS AND EQUIPMENT FOR SOIL PREPARATION
BASIC HAND TOOLS:
- HOE
- Purpose: Breaking up soil, weeding, making furrows
- Design: Flat blade attached to long handle
- Use: Chopping motion to break soil
- Best For: Medium to hard soils, weed control
- SPADE
- Purpose: Digging, turning soil, edging
- Design: Sharp, flat blade with D-handle
- Use: Push into soil with foot, lift and turn
- Best For: Digging holes, precise work
- FORK (GARDEN FORK)
- Purpose: Loosening soil, mixing materials
- Design: 3-4 metal tines on handle
- Use: Push into soil and lever up
- Best For: Hard clay soil, mixing compost
- RAKE
- Purpose: Leveling soil, removing debris
- Design: Metal or plastic tines on handle
- Use: Pull and push to smooth surface
- Best For: Final soil preparation, cleanup
- MATTOCK/CUTLASS
- Purpose: Breaking very hard soil, cutting roots
- Design: Heavy blade on short handle
- Use: Swinging motion like an axe
- Best For: Initial breaking of hard ground
MEASURING AND TESTING TOOLS:
- MEASURING TAPE/RULER
- Purpose: Planning plot sizes, plant spacing
- Use: Measure garden beds and planting distances
- pH TEST KIT
- Purpose: Testing soil acidity/alkalinity
- Use: Shows if soil is suitable for specific plants
- WATERING CAN
- Purpose: Gentle watering of prepared soil
- Use: Apply water without disturbing soil structure
TOOL CARE AND SAFETY:
MAINTENANCE:
- Clean After Use: Remove soil and debris
- Dry Storage: Prevent rust and damage
- Sharp Blades: Keep cutting tools sharp
- Handle Care: Check for cracks or damage
SAFETY GUIDELINES:
- Proper Lifting: Bend knees, not back
- Tool Inspection: Check tools before use
- Adult Supervision: For younger students
- First Aid: Know basic first aid procedures
LESSON 4 – STEPS IN SOIL PREPARATION
STEP 1: SITE SELECTION AND PLANNING
CHOOSING THE RIGHT LOCATION:
- Sunlight: Most plants need 6-8 hours daily sun
- Drainage: Avoid areas where water stands
- Accessibility: Easy to reach for maintenance
- Size: Appropriate for planned plants
PLANNING THE GARDEN:
- Measure Area: Know the size of planting space
- Draw Plan: Simple sketch of what goes where
- Plant Selection: Choose plants suitable for space
- Spacing: Plan distance between plants
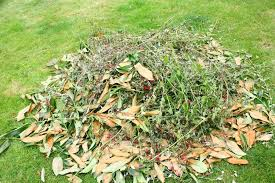
STEP 2: CLEARING THE AREA
REMOVE VEGETATION:
- Pull Weeds: Remove all existing weeds by hand
- Cut Grass: Use cutlass to cut grass close to ground
- Remove Debris: Clear stones, sticks, trash
- Root Removal: Dig out persistent weed roots
CLEAN THE SURFACE:
- Rake Away Debris: Use rake to collect materials
- Level Major Bumps: Remove large stones or mounds
- Mark Boundaries: Define the garden area clearly
STEP 3: SOIL TESTING
SIMPLE SOIL TESTS:
DRAINAGE TEST:
- Dig hole 30cm deep and 30cm wide
- Fill with water and let drain
- Fill again and time how long to drain
- Good: Drains in 1-3 hours
- Poor: Takes more than 6 hours
TEXTURE TEST:
- Take handful of moist soil
- Squeeze in hand
- Sandy: Crumbles easily, feels gritty
- Clay: Holds shape, feels sticky
- Loamy: Holds shape but crumbles easily
pH TEST (if available):
- Follow kit instructions
- Acidic: pH below 7 (needs lime)
- Neutral: pH 7 (ideal for most plants)
- Alkaline: pH above 7 (may need sulfur)
STEP 4: DIGGING AND LOOSENING
BREAKING THE GROUND:
- Start at One End: Work systematically
- Dig Deep: 20-30cm deep for most plants
- Turn Soil Over: Expose subsoil to air
- Break Large Clods: Use hoe to break up chunks
PROPER DIGGING TECHNIQUE:
- Stand Straight: Good posture prevents injury
- Use Legs: Lift with leg muscles, not back
- Small Loads: Don’t overload tools
- Take Breaks: Rest regularly to avoid fatigue
STEP 5: ADDING ORGANIC MATTER
TYPES OF ORGANIC MATTER:
COMPOST:
- Source: Decomposed plant and kitchen waste
- Benefits: Adds nutrients and improves structure
- Application: Mix 5-10cm layer into soil
ANIMAL MANURE:
- Types: Cow, goat, chicken, sheep manure
- Preparation: Must be aged/composted first
- Benefits: Rich in nutrients, improves fertility
PLANT MATERIALS:
- Dried Leaves: Chopped and mixed into soil
- Grass Clippings: Thin layer, mix well
- Crop Residues: Previous crop remains
APPLICATION METHOD:
- Spread Evenly: 5-10cm layer over soil
- Mix Thoroughly: Use fork or hoe to incorporate
- Work Into Top 15cm: Don’t bury too deep
- Water Lightly: Help decomposition begin
STEP 6: FINAL PREPARATION
LEVELING AND SMOOTHING:
- Use Rake: Level high and low spots
- Break Up Clods: Ensure fine, even texture
- Remove Stones: Pick out rocks and debris
- Create Beds: Form raised beds if needed
SOIL CONDITIONING:
- Add Sand: If soil is too heavy/clay
- Add Clay: If soil is too sandy (rarely needed)
- Mix Thoroughly: Ensure even distribution
- Test Final Texture: Should be crumbly and workable
LESSON 5 – SOIL IMPROVEMENT TECHNIQUES
IMPROVING DIFFERENT SOIL TYPES:
FOR SANDY SOIL:
- Add Organic Matter: Compost, manure, leaf mold
- Benefits: Improves water retention, adds nutrients
- Frequency: Add organic matter every season
- Amount: 25-50% organic matter by volume
FOR CLAY SOIL:
- Add Organic Matter: Same as sandy soil
- Add Coarse Sand: Improves drainage (river sand)
- Create Raised Beds: Better drainage and workability
- Never Work When Wet: Wait for proper moisture
FOR LOAMY SOIL:
- Maintain Quality: Add modest amounts of compost
- Prevent Compaction: Avoid walking on wet soil
- Regular Feeding: Light, regular organic matter additions
- Crop Rotation: Vary plants to maintain balance
NUTRIENT IMPROVEMENT:
ORGANIC FERTILIZERS:
- Compost: Balanced, slow-release nutrients
- Manure: Rich in nitrogen and organic matter
- Bone Meal: Phosphorus for root development
- Wood Ash: Potassium and raises pH
INORGANIC FERTILIZERS:
- NPK Fertilizers: Quick-acting, precise nutrients
- Urea: High nitrogen for leafy growth
- Superphosphate: Phosphorus for flowers/fruits
- Muriate of Potash: Potassium for disease resistance
APPLICATION GUIDELINES:
- Follow Instructions: Don’t over-apply fertilizers
- Mix Into Soil: Don’t leave on surface
- Water After Application: Help nutrients dissolve
- Timing: Apply when plants can use nutrients
pH ADJUSTMENT:
RAISING pH (MAKING LESS ACIDIC):
- Add Lime: Calcium carbonate or limestone
- Wood Ash: Potassium carbonate from burning
- Application: Work into soil, water well
- Timing: Apply weeks before planting
LOWERING pH (MAKING MORE ACIDIC):
- Sulfur: Elemental sulfur powder
- Organic Matter: Compost, leaf mold
- Pine Needles: Acidic mulch material
- Application: Mix into soil gradually
LESSON 6 – CREATING PLANTING BEDS
TYPES OF PLANTING BEDS:
FLAT BEDS:
- Description: Level with surrounding ground
- Best For: Well-drained areas, loamy soil
- Advantages: Easy to prepare, natural appearance
- Maintenance: Regular weeding and cultivation
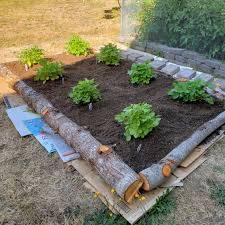
RAISED BEDS:
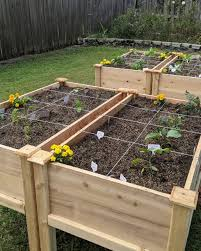
- Description: 15-30cm above ground level
- Best For: Poor drainage, clay soil, intensive gardening
- Advantages: Better drainage, easier access, warmer soil
- Construction: Build borders, fill with improved soil
CONTAINER BEDS:

- Description: Plants grown in pots, boxes, bags
- Best For: Limited space, poor soil, mobility
- Advantages: Complete soil control, moveable
- Requirements: Drainage holes, regular watering
BED PREPARATION STEPS:
FOR FLAT BEDS:
- Mark Boundaries: Use string or stakes
- Prepare Soil: Follow previous preparation steps
- Level Surface: Use rake to create even surface
- Create Furrows: Make planting rows if needed
FOR RAISED BEDS:
- Build Borders: Use wood, stone, or concrete blocks
- Fill with Soil: Use improved soil mixture
- Level Top: Rake surface smooth
- Path Planning: Leave space between beds
PLANTING LAYOUT:
ROW PLANTING:
- Straight Lines: Plants in organized rows
- Spacing: Equal distance between plants
- Access: Paths between rows for maintenance
- Best For: Vegetables, crops, large areas
INTENSIVE PLANTING:
- Close Spacing: Plants close together
- Maximum Use: More plants in less space
- Higher Yield: More production per area
- Best For: Small gardens, leafy vegetables
COMPANION PLANTING:
- Compatible Plants: Plants that help each other
- Examples: Corn, beans, and squash together
- Benefits: Natural pest control, nutrient sharing
- Planning: Research plant compatibility
LESSON 7 – PLANTING AND EARLY CARE
PLANTING TECHNIQUES:
DIRECT SEEDING:
- Make Furrows: Create shallow trenches
- Plant Depth: 2-3 times seed diameter
- Spacing: Follow seed packet instructions
- Cover Seeds: Light soil covering
- Water Gently: Avoid disturbing seeds
TRANSPLANTING SEEDLINGS:
- Dig Holes: Slightly larger than root ball
- Remove Carefully: Avoid damaging roots
- Plant at Same Depth: Root collar at soil level
- Firm Soil: Gently press around roots
- Water Immediately: Settle soil around roots
IMMEDIATE POST-PLANTING CARE:
WATERING:
- Initial Watering: Thorough but gentle
- Daily Monitoring: Check soil moisture
- Avoid Overwatering: Can cause root rot
- Morning Watering: Best time for plant uptake
MULCHING:
- Apply Mulch: 2-5cm layer around plants
- Keep Away from Stems: Prevent disease
- Materials: Grass clippings, leaves, straw
- Benefits: Conserve moisture, suppress weeds
MONITORING:
- Daily Observation: Check for problems
- Growth Signs: New leaves, strong stems
- Pest Watching: Early detection of problems
- Weather Protection: Shield from extreme conditions
LESSON 8 – MAINTENANCE AND ONGOING CARE
REGULAR MAINTENANCE TASKS:
WEEDING:
- Frequency: Weekly or as needed
- Methods: Hand pulling, hoeing, mulching
- Timing: When soil is moist but not wet
- Prevention: Thick mulch, close plant spacing
WATERING:
- Deep, Infrequent: Better than frequent shallow
- Morning Time: Reduces disease problems
- Soil Check: Water when top 5cm is dry
- Efficiency: Water soil, not leaves
FERTILIZING:
- Side Dressing: Add fertilizer beside growing plants
- Foliar Feeding: Liquid fertilizer on leaves
- Timing: During active growth periods
- Observation: Watch for nutrient deficiency signs
SEASONAL SOIL CARE:
FALL PREPARATION:
- Add Compost: Build soil for next season
- Cover Crops: Plant to protect and improve soil
- Mulch Thick: Protect soil over winter
- Tool Cleaning: Maintain equipment
SPRING RENEWAL:
- Soil Testing: Check pH and nutrients
- Add Amendments: Refresh organic matter
- Gentle Cultivation: Prepare for new planting
- Plan Rotation: Vary crop locations
PRESENTATION
To deliver the lesson, the teacher adopts the following steps:
- To introduce the lesson, the teacher revises the previous lesson on soil types and constituents. Based on this, he/she asks pupils how soil helps plants grow;
- Explains the relationship between soil and plants using examples from students’ observations;
Pupil’s Activities – Observe plant roots in soil samples and discuss what plants need from soil.
- Demonstrates the importance of soil preparation using prepared and unprepared soil samples;
Pupil’s Activities – Compare plant growth in prepared versus unprepared soil samples.
- Shows and explains different tools used for soil preparation;
Pupil’s Activities – Handle appropriate tools safely and practice proper holding techniques.
- Demonstrates step-by-step soil preparation process in a small garden plot;
Pupil’s Activities – Participate in actual soil preparation activities under supervision.
- Teaches simple soil tests and improvement techniques;
Pupil’s Activities – Perform drainage test and texture test on different soil samples.
- Guides pupils through planting seeds in prepared soil;
Pupil’s Activities – Plant seeds in their prepared soil beds and apply proper planting techniques.
- Discusses ongoing care and maintenance of planted areas;
Pupil’s Activities – Create a care schedule for their planted seeds and discuss maintenance tasks.
- Summary the lesson on the board.
Pupil’s Activities – Copy as the teacher writes.
CONCLUSION
To conclude the lesson for the week, the teacher revises all soil preparation steps and links them to the following week’s lesson on plant growth and development.
LESSON EVALUATION/ASSIGNMENT
Ask pupils to:
- List five reasons why soil preparation is important for plant growth
- Name and describe the use of four tools for soil preparation
- Outline the six main steps in soil preparation
- Perform a simple drainage test on soil from their home
- Prepare a small garden bed and plant seeds following proper procedures
WORKBOOK
WEEKLY ASSESSMENT (TEST)
- Plants get _______, water, support, and air from soil. A. Food B. Nutrients
- The first step in soil preparation is _______ the area. A. Clearing B. Watering
- A _______ is used for breaking up hard soil and weeding. A. Hoe B. Watering can
- Organic matter should be mixed into the top _______ cm of soil. A. 5 B. 15
- _______ soil needs organic matter to improve water retention. A. Sandy B. Rocky
- Good drainage means water should drain in _______ hours. A. 1-3 B. 6-8
- Seeds should be planted at a depth of _______ times their diameter. A. 2-3 B. 5-6
- _______ helps conserve moisture and suppress weeds. A. Mulching B. Digging
- The best time to water plants is in the _______. A. Evening B. Morning
- List four things plants get from soil: a. _________________ b. _________________ c. _________________ d. _________________
TOPIC – TRACK EVENT: LONG DISTANCE RACES
LEARNING AREA
- Athletic track/field or marked running area
- Measuring tape for distance marking
- Stopwatch/timer for pacing practice
- Cones or markers for course layout
- Water bottles for hydration
- Whistle for commands and intervals
- Running Technique for Distance Events
- Arm Action in Long Distance Running
- Finishing Techniques and Tactics
- Training and Performance Development
PERFORMANCE OBJECTIVES
By the end of the lesson, most of the pupils should have attained the following objectives –
- explain the characteristics and requirements of long distance running.
- identify and describe different types of long distance races including 300m and 500m.
- understand steeplechase as a specialized long distance event with obstacles.
- demonstrate proper standing position and starting techniques for distance races.
- execute correct take-off and pacing strategies for sustained running.
- display efficient running technique suitable for distance events.
- show proper arm action that conserves energy over long distances.
- demonstrate effective finishing techniques and tactical awareness.
- develop endurance and strategic thinking for distance racing.
INSTRUCTIONAL MATERIALS
The teacher will teach the lesson with the aid of:
- Athletic track/field or large open space
- Measuring tape for marking distances
- Stopwatch/timer for pacing exercises
- Cones or markers for course layout
- Water bottles for hydration
- Whistle for starting and interval signals
- Charts showing running techniques
- Pictures/videos of steeplechase events
- Low obstacles for steeplechase practice
- First aid kit and safety equipment
METHOD OF TEACHING
Choose a suitable and appropriate methods for the lessons.
Note – Irrespective of choosing methods of teaching, always introduce an activities that will arouse pupil’s interest or lead them to the lessons.
REFERENCE MATERIALS
- Scheme of Work
- 9 – Years Basic Education Curriculum
- Physical Education Curriculum
- Athletics Training Manual
- International Association of Athletics Federations (IAAF) Rules
- Distance Running Coaching Guide
- All Relevant Material
- Online Information
CONTENT OF THE LESSON
LESSON 1 – UNDERSTANDING LONG DISTANCE RUNNING
WHAT ARE LONG DISTANCE RACES?
Long distance races are running events that emphasize endurance, stamina, and strategic pacing rather than pure speed. These events require sustained effort over extended periods and distances.
KEY CHARACTERISTICS OF LONG DISTANCE RUNNING:
- ENDURANCE FOCUS
- Cardiovascular Fitness: Strong heart and lungs essential
- Muscular Endurance: Ability to maintain effort over time
- Mental Toughness: Overcoming fatigue and discomfort
- Energy Management: Efficient use of body’s energy stores
- PACING STRATEGY
- Controlled Speed: Cannot run at maximum throughout
- Energy Distribution: Managing effort across entire race
- Tactical Awareness: Responding to race developments
- Split Times: Monitoring pace throughout race
- EFFICIENT TECHNIQUE
- Energy Conservation: Smooth, economical movement
- Consistent Form: Maintaining technique when tired
- Relaxation: Avoiding unnecessary tension
- Rhythm Maintenance: Steady, sustainable cadence
- AEROBIC ENERGY SYSTEM
- Oxygen Usage: Primary energy comes from oxygen
- Sustainable Pace: Speed that can be maintained
- Recovery Ability: Quick recovery between efforts
- Fat Burning: Using stored fat as fuel source
DIFFERENCES FROM SPRINT RACES:
| ASPECT | SPRINTS | LONG DISTANCE |
| Duration | 10-60 seconds | 1-30+ minutes |
| Energy System | Anaerobic | Aerobic |
| Strategy | Maximum speed | Pacing and tactics |
| Training Focus | Speed and power | Endurance and efficiency |
| Mental Demands | Explosive start | Sustained concentration |
LESSON 2 – TYPES OF LONG DISTANCE RACES
CLASSIFICATION OF DISTANCE EVENTS:
SHORT DISTANCE (100m-200m): Pure sprints requiring maximum speed MIDDLE DISTANCE (300m-1500m): Combination of speed and endurance LONG DISTANCE (3000m+): Pure endurance events
300 METER RACE
RACE CHARACTERISTICS:
- Distance: 300 meters (3/4 of standard track)
- Duration: 35-50 seconds for youth athletes
- Classification: Extended sprint/short middle distance
- Track Layout: Starts on curve, finishes on straight
ENERGY DEMANDS:
- Primary System: Anaerobic lactic (85%)
- Secondary System: Aerobic (15%)
- Key Challenge: Lactate tolerance and speed endurance
- Fatigue Factor: Significant lactate buildup in final 100m
RACE STRATEGY:
- First 100m (Curve): Controlled fast start (90-95% effort)
- Middle 100m: Maintain speed while managing lactate (85-90% effort)
- Final 100m (Straight): Fight through fatigue, maintain form (95-100% effort)
TECHNICAL REQUIREMENTS:
- Curve Running: Efficient technique around bend
- Speed Endurance: Maintaining velocity when fatigued
- Lactate Tolerance: Running efficiently with high lactate levels
- Mental Toughness: Pushing through significant discomfort
500 METER RACE
RACE CHARACTERISTICS:
- Distance: 500 meters (1.25 laps of standard track)
- Duration: 70-100 seconds for youth athletes
- Classification: True middle distance event
- Track Layout: Starts on straight, includes curve and straight finish
ENERGY DEMANDS:
- Primary System: Aerobic (60%) and Anaerobic lactic (40%)
- Key Challenge: Balancing aerobic and anaerobic systems
- Pacing Critical: Even pace distribution essential
- Tactical Element: Positioning and race awareness important
RACE STRATEGY:
- First 200m: Controlled start, establish good position (80-85% effort)
- Middle 200m: Settle into race pace, tactical positioning (75-80% effort)
- Final 100m: Gradual acceleration to strong finish (90-95% effort)
TECHNICAL REQUIREMENTS:
- Pacing Judgment: Accurate pace assessment throughout
- Tactical Awareness: Positioning relative to competitors
- Efficient Form: Maintaining technique over longer duration
- Finishing Kick: Ability to accelerate when fatigued
TRAINING IMPLICATIONS:
FOR 300M RUNNERS:
- Speed Endurance: 200-400m repeats at race pace
- Lactate Tolerance: High-intensity intervals
- Speed Work: 100-150m sprints for basic speed
- Recovery: Adequate rest between high-intensity sessions
FOR 500M RUNNERS:
- Aerobic Base: Longer runs for endurance foundation
- Tempo Runs: Sustained efforts at moderate intensity
- Speed Work: 200-300m intervals
- Pacing Practice: Learning to judge and maintain pace
LESSON 3 – STEEPLECHASE IN LONG DISTANCE RACING
WHAT IS STEEPLECHASE?
Steeplechase is a specialized distance running event that combines endurance running with obstacle clearance skills. Athletes must navigate barriers and water jumps while maintaining racing pace.
STEEPLECHASE SPECIFICATIONS:
STANDARD DISTANCES:
- Youth/School: 1500m or 2000m steeplechase
- Junior: 2000m steeplechase
- Senior: 3000m steeplechase (Olympic standard)
OBSTACLE SPECIFICATIONS:
- Barrier Height:
- Men: 91.4cm (36 inches)
- Women: 76.2cm (30 inches)
- Youth: Adjusted heights (60-80cm)
- Barrier Width: 3.96m (13 feet)
- Barrier Weight: 80-100kg (immovable)
COURSE LAYOUT:
- Regular Barriers: 4 per lap
- Water Jump: 1 per lap (usually inside track)
- Total Obstacles: 28 barriers + 7 water jumps = 35 obstacles (3000m)
- Barrier Spacing: Approximately equal distribution
STEEPLECHASE TECHNIQUES:
BARRIER CLEARANCE:
APPROACH TECHNIQUE:
- Rhythm Maintenance: Keep normal running stride pattern
- Takeoff Distance: 2-3 feet from barrier
- Lead Leg: Drive knee up and forward
- Trail Leg: Quick, efficient clearance
- Landing: Continue running rhythm immediately
STEP-ON TECHNIQUE (RECOMMENDED FOR BEGINNERS):
- Step on Barrier: Place lead foot on top of barrier
- Drive Through: Push off barrier with lead leg
- Trail Leg: Swing over quickly
- Forward Momentum: Maintain forward drive
- Quick Transition: Resume running immediately
WATER JUMP TECHNIQUE:
APPROACH:
- Accelerate Slightly: Build momentum for obstacle
- Step on Barrier: Use inside foot on barrier top
- Drive Forward: Push off barrier toward water
- Land in Water: Outside foot lands in water pit
- Exit Quickly: Minimize time in water
WATER LANDING:
- Foot Placement: Ball of foot, not heel
- Body Position: Lean forward, maintain balance
- Quick Steps: 2-3 quick steps through water
- Exit Strategy: Explosive drive out of water
STEEPLECHASE STRATEGY:
PACING CONSIDERATIONS:
- Conservative Early: Focus on rhythm and technique
- Obstacle Rhythm: Maintain consistent approach to barriers
- Energy Management: Save energy for final kilometers
- Technical Focus: Efficiency more important than speed
TACTICAL ELEMENTS:
- Positioning: Avoid crowding at obstacles
- Inside Lane: Generally preferred for shorter distance
- Obstacle Traffic: Plan for congestion at barriers
- Final Kick: Same as other distance races
TRAINING FOR STEEPLECHASE:
SKILL DEVELOPMENT:
- Barrier Practice: Daily technique work
- Water Jump Drills: Specific water obstacle training
- Rhythm Drills: Maintaining stride pattern
- Flexibility Work: Hip and ankle mobility
FITNESS REQUIREMENTS:
- Endurance Base: Same as other distance events
- Power Development: For efficient obstacle clearance
- Coordination: Combining running and jumping skills
- Mental Training: Managing additional complexity
LESSON 4 – STANDING POSITION AND STARTING TECHNIQUES
Long distance races typically use standing starts rather than starting blocks, requiring different techniques from sprint events.
STANDING START POSITION:
FOOT PLACEMENT:
- Width: Shoulder-width apart or slightly narrower
- Stagger: Preferred foot slightly ahead (6-12 inches)
- Angle: Slight angle toward running direction
- Balance: Weight evenly distributed
BODY POSITION:
- Posture: Upright with slight forward lean
- Knees: Slightly bent, ready to drive
- Arms: Relaxed at sides or in comfortable position
- Head: Up, eyes focused ahead on track
MENTAL PREPARATION:
- Race Strategy: Final review of race plan
- Relaxation: Stay calm and composed
- Focus: Concentrate on execution
- Confidence: Positive mental state
STARTING COMMANDS FOR DISTANCE RACES:
“RUNNERS TO YOUR MARKS”:
- Movement: Approach starting line
- Positioning: Take comfortable starting position
- Stillness: Become motionless
- Mental: Final mental preparation
“SET” (SOMETIMES OMITTED IN DISTANCE RACES):
- Ready Position: Slight crouch if used
- Stillness: Complete motionlessness
- Tension: Controlled readiness
- Focus: Concentration on start signal
STARTING SIGNAL (GUN/WHISTLE):
- Reaction: Quick but controlled response
- Acceleration: Gradual build to race pace
- Positioning: Establish good tactical position
- Pace: Avoid going out too fast
STARTING STRATEGY:
EFFORT LEVEL:
- Initial Acceleration: 80-85% of maximum effort
- Avoid Speed Trap: Don’t match sprint pace
- Controlled Build: Gradual increase to race pace
- Energy Conservation: Save energy for later in race
POSITIONING TACTICS:
- Lane Advantage: Inside lanes generally preferred
- Avoid Trouble: Stay clear of potential problems
- Good Position: Establish position in front third of field
- Patience: Don’t panic about early position
FIRST 100-200 METERS:
- Settle In: Find sustainable rhythm quickly
- Assess Field: Evaluate other runners’ strategies
- Tactical Awareness: Watch for early moves
- Form Focus: Maintain efficient technique
LESSON 5 – TAKE-OFF AND PACING STRATEGIES
TAKE-OFF PHASE (FIRST 50-100M):
ACCELERATION PRINCIPLES:
- Gradual Build: Unlike sprints, build speed progressively
- Controlled Effort: Resist urge to match fast starters
- Smooth Transition: From standing to optimal race pace
- Form Emphasis: Maintain good technique throughout
POSITIONING DURING TAKE-OFF:
- Inside Track: Try to secure inside lane position
- Avoid Boxing: Don’t get trapped behind slower runners
- Strategic Position: Top third of field generally good
- Stay Alert: Watch for gaps and opportunities
PACING FUNDAMENTALS:
UNDERSTANDING PACE: Pace is the rate of speed maintained throughout a race, typically measured as time per distance (e.g., seconds per 100m).
PACING STRATEGIES:
EVEN PACE (RECOMMENDED FOR BEGINNERS):
- Concept: Maintain same speed throughout race
- Benefits: Energy conservation, predictable race
- Method: Use time splits to monitor pace
- Best For: 800m and longer distances
NEGATIVE SPLIT:
- Concept: Run second half faster than first half
- Benefits: Strong finish, good energy management
- Risk: May fall too far behind early
- Best For: Experienced runners, longer distances
POSITIVE SPLIT:
- Concept: Run first half faster than second half
- Risks: Early fatigue, poor finish
- Sometimes Necessary: Very tactical races
- Generally Avoided: Less efficient strategy
VARIABLE PACE:
- Concept: Change pace based on tactical situations
- Advanced Strategy: Requires experience and fitness
- Elements: Surges, responses to moves, kicks
- Best For: Highly competitive, tactical races
PACE JUDGMENT SKILLS:
INTERNAL MONITORING:
- Breathing Pattern: Monitor breathing rhythm and depth
- Effort Perception: Use 1-10 scale to assess effort
- Muscle Tension: Stay relaxed in non-essential muscles
- Heart Rate Awareness: Learn to sense heart rate zones
EXTERNAL MARKERS:
- Split Times: Use lap times and intermediate splits
- Competition: Use other runners as pace guides
- Track Markers: Utilize 100m marks for timing
- Coach Signals: Listen for pace feedback from sideline
DEVELOPING PACE SENSE:
- Practice Runs: Regular tempo runs at specific paces
- Time Trials: Solo efforts to learn pace judgment
- Interval Training: Repeated efforts at race pace
- Race Experience: Learning through competition
LESSON 6 – RUNNING TECHNIQUE FOR DISTANCE EVENTS
Efficient running form is crucial for distance events to conserve energy and maintain speed over extended periods.
BODY POSITION AND POSTURE:
HEAD AND NECK:
- Position: Head up, eyes looking 10-20 meters ahead
- Alignment: Natural extension of spine
- Relaxation: Avoid tension in neck and jaw
- Breathing: Keep airways open and unrestricted
TORSO:
- Posture: Upright with slight forward lean (2-3 degrees)
- Core: Engaged but not tense
- Shoulders: Relaxed, not hunched or elevated
- Chest: Open for optimal breathing
OVERALL ALIGNMENT:
- Efficiency: All movement directed forward
- Balance: Maintain equilibrium throughout stride
- Consistency: Same form whether fresh or fatigued
- Adaptation: Adjust slightly for terrain or conditions
LEG ACTION AND FOOT STRIKE:
STRIDE CHARACTERISTICS:
- Length: Moderate stride, avoid overstriding
- Frequency: Higher turnover preferred (180-190 steps/minute)
- Ground Contact: Minimal ground contact time
- Efficiency: Maximum distance with minimum energy
FOOT STRIKE PATTERNS:
- Midfoot Strike: Preferred for most distance runners
- Forefoot Strike: Acceptable, naturally faster cadence
- Heel Strike: Generally less efficient, higher impact
- Individual Variation: Some variation is normal
LEG MECHANICS:
- Knee Drive: Moderate knee lift, not excessive
- Foot Placement: Under center of gravity, not ahead
- Push-off: Active drive through toe-off
- Recovery: Efficient leg swing with relaxed muscles
BREATHING TECHNIQUE:
BREATHING PATTERNS:
- Rhythmic Breathing: Coordinate with running rhythm
- Deep Breathing: Use full lung capacity
- Nose and Mouth: Both used for optimal oxygen intake
- Relaxed Pattern: Don’t force unnatural rhythms
COMMON BREATHING RATIOS:
- 3:2 Pattern: 3 steps inhale, 2 steps exhale (moderate pace)
- 2:2 Pattern: 2 steps inhale, 2 steps exhale (faster pace)
- 2:1 Pattern: 2 steps inhale, 1 step exhale (high intensity)
- Natural Rhythm: Allow breathing to find its rhythm
ENERGY CONSERVATION PRINCIPLES:
MINIMIZE WASTE:
- Vertical Oscillation: Reduce up-and-down movement
- Lateral Movement: Keep energy directed forward
- Unnecessary Tension: Relax non-working muscles
- Consistent Form: Maintain efficiency when tired
EFFICIENCY FOCUS:
- Smooth Rhythm: Consistent, flowing movement
- Quick Feet: Fast ground contact, quick turnover
- Forward Lean: Use gravity to assist forward motion
- Relaxed Power: Strong but not tense muscle action
LESSON 7 – ARM ACTION IN LONG DISTANCE RUNNING
Proper arm action contributes significantly to running efficiency and helps maintain balance and rhythm in distance events.
ARM POSITION AND MOVEMENT:
ARM ANGLE:
- Bend: Arms bent at approximately 90 degrees
- Variation: Slight angle changes acceptable (85-95 degrees)
- Consistency: Maintain angle throughout race
- Natural Feel: Should feel comfortable and sustainable
ARM SWING:
- Direction: Forward and backward, not across body
- Range: Moderate swing, hands from hip to lower chest
- Coordination: Opposite arm to opposite leg pattern
- Rhythm: Smooth, consistent rhythm matching leg cadence
HAND POSITION:
- Fingers: Lightly closed, not clenched fists
- Thumbs: Resting on top of fingers
- Wrists: Neutral position, not bent up or down
- Relaxation: Minimal tension, relaxed grip
FUNCTIONS OF ARM ACTION:
BALANCE AND STABILITY:
- Counterbalance: Arms balance leg movement
- Stability: Help maintain upright posture
- Direction: Assist in maintaining straight running line
- Coordination: Improve overall movement efficiency
MOMENTUM AND POWER:
- Forward Drive: Contribute to forward momentum
- Rhythm Maintenance: Help establish and maintain cadence
- Power Transfer: Assist in transferring energy through body
- Efficiency: Reduce energy cost of running
DISTANCE-SPECIFIC ARM TECHNIQUE:
ENERGY CONSERVATION:
- Relaxed Action: Less aggressive than sprint arm action
- Sustainable Movement: Must function for extended periods
- Minimal Tension: Conserve energy in upper body
- Consistent Pattern: Same action throughout race
ENDURANCE CONSIDERATIONS:
- Comfort Priority: Comfort more important than maximum power
- Fatigue Management: Maintain form when arms get tired
- Breathing Assistance: Coordinate with breathing patterns
- Recovery: Allow arms to relax during easy running
COMMON ARM ACTION ERRORS:
ENERGY-WASTING MOVEMENTS:
- Excessive Swing: Arms swinging too high or wide
- Crossing Body: Arms swinging across body centerline
- Tension: Carrying unnecessary tension in shoulders/arms
- Asymmetry: Different action with left and right arms
CORRECTIONS:
- Practice Drills: Specific arm swing exercises
- Relaxation Cues: Conscious relaxation during runs
- Mirror Work: Visual feedback for form correction
- Progressive Training: Gradually improve efficiency
LESSON 8 – FINISHING TECHNIQUES AND TACTICS
The finish in distance races requires tactical awareness, strategic thinking, and proper execution of final sprint techniques.
APPROACHING THE FINISH:
FINAL 400 METERS:
- Assessment Phase: Evaluate position and remaining energy
- Strategic Positioning: Move to tactically advantageous position
- Energy Check: Assess available energy reserves
- Competition Awareness: Monitor other runners’ positions and condition
FINAL 200 METERS:
- Decision Point: Commit to finishing strategy
- Position Improvement: Move up if necessary for good position
- Form Focus: Maintain efficient running technique
- Mental Preparation: Prepare for final effort and discomfort
FINAL 100 METERS:
- Full Commitment: Maximum available effort
- Form Maintenance: Fight to maintain good technique
- Drive Phase: Use increased arm action to assist speed
- Run Through: Continue effort 5-10 meters past finish line
FINISHING STRATEGIES:
KICK FINISH:
- Energy Reserve: Save energy throughout race for strong finish
- Timing: Begin acceleration at optimal distance (150-400m out)
- Progression: Gradual then rapid increase in pace
- Best For: Runners with good speed reserve and tactical awareness
SUSTAINED PRESSURE:
- Even Effort: Maintain consistent pressure throughout
- Form Emphasis: Focus on technique maintenance
- Mental Toughness: Fight through fatigue with determination
- Best For: Runners with superior endurance base
TACTICAL FINISH:
- Responsive: React to competitors’ moves
- Positioning: Use tactical positioning to advantage
- Timing: Wait for optimal moment to make final move
- Best For: Experienced runners with good race sense
FINISHING FORM:
BODY POSITION:
- Posture: Maintain upright posture, avoid leaning back
- Head: Keep head up, drive with eyes forward
- Core: Engage core muscles for stability
- Lean: Slight forward lean acceptable, but minimal
ARM ACTION:
- Increased Drive: Slightly more aggressive arm action
- Maintain Form: Keep proper arm swing pattern
- Power Assistance: Use arms to help generate speed
- Balance: Arms help maintain balance during sprint
LEG ACTION:
- Turnover: Increase leg turnover/cadence
- Stride: May slightly increase stride length
- Push-off: More aggressive toe-off phase
- Form: Maintain good mechanics despite fatigue
COMMON FINISHING ERRORS:
TACTICAL MISTAKES:
- Too Early: Starting final kick too far from finish
- Too Late: Waiting too long to begin final effort
- Poor Position: Being in wrong place tactically
- No Response: Failing to respond to competitors’ moves
TECHNICAL MISTAKES:
- Form Breakdown: Losing efficiency under fatigue
- Overstriding: Taking steps too long when tired
- Tension: Carrying excessive tension in final sprint
- Head Down: Looking down instead of ahead
RACE TACTICS AND STRATEGY:
PRE-RACE PLANNING:
- Know Competition: Study other runners’ strengths and tactics
- Race Plan: Develop primary and alternative strategies
- Conditions: Consider weather, track conditions, field size
- Personal Best: Plan based on current fitness level
DURING RACE EXECUTION:
- Patience: Don’t panic with early moves or positioning
- Adaptation: Adjust strategy based on race development
- Opportunity Recognition: Identify and exploit tactical opportunities
- Confidence: Execute plan with conviction and confidence
LESSON 9 – TRAINING AND PERFORMANCE DEVELOPMENT
TRAINING PRINCIPLES FOR DISTANCE RUNNING:
AEROBIC BASE DEVELOPMENT:
- Easy Runs: 70-80% of training at conversational pace
- Long Runs: Weekly long run to build endurance
- Consistency: Regular training over extended periods
- Progressive Overload: Gradually increase training load
SPECIFIC RACE PREPARATION:
- Tempo Runs: Sustained efforts at race pace or slightly faster
- Interval Training: Repeated faster efforts with recovery
- Race Simulation: Practice race tactics and pacing
- Taper: Reduce training before important competitions
SAMPLE TRAINING WEEK (BEGINNER):
MONDAY: Easy run 20-30 minutes TUESDAY: Speed work – 4 × 200m with full recovery WEDNESDAY: Easy run 25-35 minutes THURSDAY: Tempo run 15-20 minutes at moderate effort FRIDAY: Rest or easy 15-20 minutes SATURDAY: Long run 40-60 minutes easy pace SUNDAY: Rest or cross-training activity
PERFORMANCE MONITORING:
TIME TRIALS:
- Regular Testing: Monthly time trials over race distances
- Progress Tracking: Monitor improvement over time
- Pace Practice: Learn race pace through testing
- Confidence Building: Build confidence through measured progress
TRAINING LOG:
- Daily Records: Track daily training activities
- Effort Levels: Record subjective effort ratings
- Health Monitoring: Note any injuries or illnesses
- Performance Analysis: Review training for patterns and improvements
PRESENTATION
To deliver the lesson, the teacher adopts the following steps:
- To introduce the lesson, the teacher revises previous lessons on sprint racing. Based on this, he/she asks pupils about differences between running very fast for short distances versus maintaining speed over longer distances;
- Explains the characteristics of long distance running and demonstrates pacing differences from sprints;
Pupil’s Activities – Practice running at different paces to understand the concept of sustainable speed versus maximum speed.
- Introduces the specific distances (300m and 500m) and their unique demands;
Pupil’s Activities – Walk and jog the specific distances to understand race length and develop sense of pacing requirements.
- Demonstrates steeplechase concept with simple obstacle practice;
Pupil’s Activities – Practice stepping over low obstacles while maintaining running rhythm and learn basic barrier technique.
- Shows proper standing start position and take-off for distance races;
Pupil’s Activities – Practice standing starts with controlled acceleration and learn proper positioning strategies.
- Demonstrates efficient distance running form and energy conservation techniques;
Pupil’s Activities – Practice distance running form over short segments, focusing on relaxation and efficiency.
- Teaches proper arm action for distance running and its role in energy conservation;
Pupil’s Activities – Practice arm action drills and learn to coordinate arms with breathing patterns.
- Shows finishing techniques and develops tactical awareness;
Pupil’s Activities – Practice finishing techniques over 50-100m segments with different strategic approaches.
- Organizes practice races over appropriate distances emphasizing learned techniques;
Pupil’s Activities – Participate in 200-400m practice races applying pacing, technique, and tactical concepts.
CONCLUSION
To conclude the lesson for the week, the teacher revises all long distance running concepts and links them to the following week’s lesson on endurance training methods and race preparation.
LESSON EVALUATION
Asks pupils to:
- Explain the key differences between long distance and sprint racing
- Demonstrate proper standing start and controlled take-off for distance events
- Show efficient distance running form emphasizing energy conservation
- Practice appropriate arm action for sustained running
- Display understanding of basic pacing and finishing strategies
WORKBOOK
WEEKLY ASSESSMENT (TEST)
- Long distance races emphasize _______ over pure speed. A. Jumping ability B. Endurance
- A 300m race is classified as a _______ distance event. A. Sprint B. Middle distance
- The 500m race requires approximately _______ energy from aerobic systems. A. 30% B. 60%
- Steeplechase combines distance running with _______. A. Swimming B. Obstacle clearance
- Distance races typically use a _______ start position. A. Standing B. Crouched
- _______ pacing means running each section at the same speed. A. Variable B. Even
- In distance running, arms should be more _______ than in sprinting. A. Aggressive B. Relaxed
- The primary energy system for 500m racing is _______. A. Anaerobic B. Aerobic
- A strong finishing effort in distance races is called a _______. A. Kick B. Surge
- List the five main technical elements of distance racing: a. _________________ b. _________________ c. _________________ d. _________________ e. _________________
TOPIC: TYPING AND SAVING ON MICROSOFT POWERPOINT
LEARNING AREA
- Introductory Activities
- Simple Typing in PowerPoint
- Basic Saving in PowerPoint
PERFORMANCE OBJECTIVES
By the end of this lesson, pupils should be able to:
- Type text in PowerPoint slides.
- Save their PowerPoint work.
- Use simple formatting like bold and color.
TEACHING AND LEARNING MATERIALS
- Computer/Laptop
- Microsoft PowerPoint
- Projector
- Sample text for typing
TEACHING AND LEARNING METHOD
- Simple demonstration
- Hands-on practice
- Step-by-step guidance
REFERENCE MATERIALS
- Primary Computer Studies Textbook
- PowerPoint for Kids Guide
ENTRY BEHAVIOUR/ PREVIOUS LESSON
Students can use a computer mouse and keyboard.
WORD FILE
Type, text, save, slide, title.
CONTENT
LESSON 1 – TYPING IN POWERPOINT
WHAT IS TYPING IN POWERPOINT?
Typing in PowerPoint means writing words on slides to make presentations.
WHERE TO TYPE:
TITLE BOX:
- Click where it says “Click to add title”
- Type your slide title
- Example: “My Family” or “Animals”
CONTENT BOX:
- Click where it says “Click to add text”
- Type your main information
- Press Enter for new lines
SIMPLE TYPING STEPS:
- Open PowerPoint
- Click in title box
- Type your title
- Click in content box
- Type your information
LESSON 2 – SIMPLE FORMATTING
MAKING TEXT LOOK NICE:
BOLD TEXT:
- Select text (highlight it)
- Click B button
- Text becomes thick and dark
CHANGE COLOR:
- Select text
- Click color button (A with color)
- Choose your favorite color
MAKE TEXT BIGGER:
- Select text
- Use size box to make bigger
- Try sizes like 20, 24, 28
LESSON 3 – SAVING YOUR WORK
WHY SAVE?
- Keep your work safe
- Use it again later
- Don’t lose what you made
HOW TO SAVE:
FIRST TIME SAVING:
- Click File
- Click Save As
- Type a name (like “My Presentation”)
- Click Save
SAVING AGAIN:
- Press Ctrl + S
- Your work is saved quickly
GOOD FILE NAMES:
- “My School Project”
- “Animal Presentation”
- “Family Slides”
DON’T USE:
- Just numbers (123)
- Hard to read names
PRESENTATION
- Teacher shows PowerPoint on big screen
- Teacher clicks in title box and types “Hello Class”
- Teacher shows how to click in content box
- Teacher types simple text like “Today is a good day”
- Teacher makes text bold and changes color
- Teacher saves the presentation step by step
STUDENT ACTIVITIES
Students practice:
- Clicking in title and content boxes
- Typing simple sentences
- Making text bold
- Changing text color
- Saving their work
EVALUATIVE ACTIVITIES
- Type a title in PowerPoint
- Type three sentences in content box
- Make text bold
- Save presentation with good name
LESSON EVALUATION/ASSIGNMENT
Create a simple presentation about yourself:
- Title: “About Me”
- Write your name, age, and favorite color
- Make title bold and red
- Save as “My Info”
WORKBOOK
WEEKLY ASSESSMENT (TEST)
- To type in PowerPoint, first _______ in the text box. A. Double-click B. Click
- To make text bold, select it and click _______. A. B B. I
- To save work quickly, press _______. A. Ctrl + S B. Ctrl + P
- A good file name is _______. A. “My School Project” B. “123”
- The title box says “_______” before you type. A. “Click to add title” B. “Type here”
PRACTICAL ACTIVITIES
- Simple Typing: Type “My Favorite Food” as title and three food names
- Formatting Practice: Make title bold and blue
- Save Practice: Save presentation as “Food Slides”
Second Term Basic Science Lesson Notes for Other Topics

Water - Packaged Water
Explore lesson notes covering all topics.

Soil I - Importance To Plants
Explore lesson notes covering all topics.

Soil II - Importance To Animals
Explore lesson notes covering all topics.

Air In Motion I - Wind
Explore lesson notes covering all topics.

Air In Motion II - Harmful Effects Of Wind
Explore lesson notes covering all topics.

Water
Explore lesson notes covering all topics.

Qualities Of Water
Explore lesson notes covering all topics.

Water - Purifying Water
Explore lesson notes covering all topics.
Animals - Common Uses
Explore lesson notes covering all topics.

Animals
Explore lesson notes covering all topics.

Plants - Common Uses
Explore lesson notes covering all topics.

Plants
Explore lesson notes covering all topics.

Clay - Practical
Explore lesson notes covering all topics.

Loamy Soil
Explore lesson notes covering all topics.

Clay Soil
Explore lesson notes covering all topics.
Lesson Notes for Other Classes

Basic 2 Lesson Note
The complete lesson note to guide your studies.
Basic 3 Lesson Note
The complete lesson note to guide your studies.

Basic 5 Lesson Note
The complete lesson note to guide your studies.

JSS1 Lesson Note
The complete lesson note to guide your studies.

JSS2 Lesson Note
The complete lesson note to guide your studies.

JSS3 Lesson Note
The complete lesson note to guide your studies.