Measurement (Measuring Liquids), Gymnastics, and Coding – Basic 4 Basic Science Lesson Note (Second Term)
Download Lesson NoteLesson note at a glance
- Subject
- Basic Science
- Class
- Basic 4
- Term
- Second Term
- Topic
- Measurement (Measuring Liquids), Gymnastics, and Coding
- Order
- Topic 7 of 9 this term
- Reading time
- 12 min
Topic: measurement (measuring liquids)
LEARNING AREA
- Introductory Activities
- What is Measuring Liquids?
- Materials for Measuring Liquids
- Metric Units for Measuring Liquids
- How to Measure Volume of Fluids
- Making Our Own Measuring Cylinder
PERFORMANCE OBJECTIVES
By the end of this lesson, pupils should be able to:
- Know what measuring liquids means.
- Name materials used for measuring liquids.
- Know metric units like ml (milliliters).
- Measure the volume of different fluids.
- Make a simple measuring cylinder.
TEACHING AND LEARNING MATERIALS
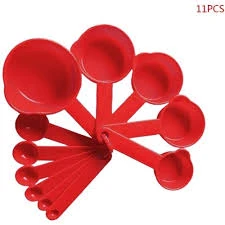
- Measuring cups
- Measuring cylinder

- Water
- Different containers
- Plastic bottles
- Ruler
- Marker pen
- Different liquids (juice, oil)
TEACHING AND LEARNING METHOD
- Simple demonstration
- Hands-on practice
- Step-by-step guidance
REFERENCE MATERIALS
- Primary Mathematics Textbook
- Basic Measurement Guide
ENTRY BEHAVIOUR/ PREVIOUS LESSON
Students can count and understand basic measurement concepts.
WORD FILE
Measure, liquid, volume, milliliters, ml, cylinder, container.
CONTENT
LESSON 1 – WHAT IS MEASURING LIQUIDS?
WHAT IS MEASURING LIQUIDS?
Measuring liquids means finding out how much liquid we have in a container.
WHY DO WE MEASURE LIQUIDS?
- To know how much water to drink
- To cook food with right amount of liquid
- To give correct medicine
- To share liquids fairly
- To buy the right amount
WHAT ARE LIQUIDS?
- Water – for drinking and washing
- Milk – for drinking and cooking
- Juice – orange, apple, grape
- Oil – for cooking food
- Medicine – liquid medicines
MEASURING MEANS:
- Finding out “how much”
- Using numbers to describe amount
- Comparing different quantities
- Making sure we have enough
LESSON 2 – MATERIALS FOR MEASURING LIQUIDS
TOOLS WE USE TO MEASURE LIQUIDS:
MEASURING CUP:
- Has lines with numbers
- Shows how much liquid inside
- Usually made of plastic or glass
- Used in kitchen for cooking
MEASURING CYLINDER:
- Tall, narrow container
- Has marks going up the side
- Very accurate for measuring
- Used in science
MEASURING SPOONS:
- Small spoons with exact sizes
- For measuring small amounts
- Used for medicine or cooking
- Different sizes available
GRADUATED BEAKER:
- Wide container with measurements
- Easy to pour liquids in and out
- Has handle for easy holding
- Clear so we can see liquid
EVERYDAY CONTAINERS:
- Bottles – with measurement marks
- Jugs – for measuring water
- Cups – with lines showing amounts
- Syringes – for exact small amounts
HOW TO CHOOSE RIGHT TOOL:
- Big amounts – use measuring cups or jugs
- Small amounts – use measuring spoons
- Very exact amounts – use measuring cylinder
- Medicine – use special measuring spoons
LESSON 3 – METRIC UNITS FOR MEASURING LIQUIDS
WHAT ARE METRIC UNITS?
Metric units are the standard way we measure things all around the world.
MAIN UNIT: MILLILITERS (ml)
WHAT IS A MILLILITER?
- ml is short for milliliter
- Very small amount of liquid
- Like a few drops of water
- 1000 ml = 1 liter
COMMON AMOUNTS IN MILLILITERS:
- 5 ml – one teaspoon of medicine
- 15 ml – one tablespoon
- 250 ml – one cup of water
- 500 ml – one small bottle of water
- 1000 ml – one big bottle of water
EXAMPLES WE KNOW:
- Small juice box – 200 ml
- Can of soda – 330 ml
- Water bottle – 500 ml or 1000 ml
- Milk carton – 1000 ml (1 liter)
READING MEASUREMENTS:
- Look at the liquid level
- Find the number at that level
- Read from eye level (not from above or below)
- Always use the bottom of liquid curve
OTHER METRIC UNITS:
- Liter (L) – 1000 milliliters
- Used for – big amounts like fuel, large drinks
- 1 Liter = 1000 ml
LESSON 4 – MEASURING THE VOLUME OF FLUIDS
WHAT IS VOLUME?
Volume means how much space a liquid takes up inside a container.
HOW TO MEASURE VOLUME:
STEP 1: CHOOSE RIGHT CONTAINER
- Pick measuring tool that fits amount
- Make sure container is clean
- Check that measurements are clear
STEP 2: POUR LIQUID CAREFULLY
- Pour slowly to avoid spills
- Stop when reaching desired amount
- Don’t fill too quickly
STEP 3: READ AT EYE LEVEL
- Put container on flat surface
- Look at liquid level from the side
- Read number where liquid stops
- Use bottom of liquid curve (meniscus)
STEP 4: RECORD THE AMOUNT
- Write down the number
- Include “ml” after number
- Example: 250 ml, 500 ml
MEASURING DIFFERENT LIQUIDS:
WATER:
- Clear and easy to see
- Measures exactly like numbers show
- Good for practicing measurement
THICK LIQUIDS (like honey):
- Pour more slowly
- Let settle before reading
- May stick to container sides
COLORED LIQUIDS:
- Sometimes harder to see level
- Use good lighting
- Read carefully at eye level
COMMON MISTAKES TO AVOID:
- Reading from above (looks different)
- Not using flat surface
- Rushing when pouring
- Forgetting to write “ml”
LESSON 5 – MAKING OUR OWN MEASURING CYLINDER
HOW TO IMPROVISE A MEASURING CYLINDER:
MATERIALS NEEDED:
- Clear plastic bottle (500ml water bottle)
- Ruler
- Permanent marker
- Water
- Known measuring cup (to check accuracy)
STEP-BY-STEP INSTRUCTIONS:
STEP 1: PREPARE THE BOTTLE
- Use clean, clear plastic bottle
- Remove label if possible
- Make sure bottle is completely dry
STEP 2: MAKE MEASUREMENT MARKS
- Start from bottom of bottle
- Use ruler to make marks every 2 cm
- Draw straight lines across bottle
- Number each line (50ml, 100ml, 150ml, etc.)
STEP 3: TEST YOUR CYLINDER
- Use real measuring cup to add 100ml water
- Pour into your bottle
- Check if water reaches 100ml mark
- Adjust marks if needed
STEP 4: COMPLETE THE MARKINGS
- Continue marking up the bottle
- Make smaller marks between big ones
- Label clearly with permanent marker
- Test with different amounts
USING YOUR HOMEMADE CYLINDER:
- Pour liquid slowly
- Read at eye level
- Use for measuring water, juice, oil
- Clean after each use
ADVANTAGES OF HOMEMADE CYLINDER:
- Free – doesn’t cost money
- Available – can make anytime
- Personal – belongs to you
- Practice – helps understand measurement
CARE INSTRUCTIONS:
- Handle carefully (plastic can break)
- Clean with soap and water
- Store in safe place
- Don’t use for hot liquids
PRESENTATION
- Teacher shows different measuring tools and explains their uses
- Teacher demonstrates how to read measurements at eye level
- Teacher shows milliliter examples using real containers
- Teacher measures different liquids step by step
- Teacher guides students in making simple measuring cylinder
STUDENT ACTIVITIES
Students practice:
- Identifying different measuring tools
- Reading measurements on measuring cups
- Measuring 100ml, 200ml, 500ml of water
- Making their own measuring cylinder
- Measuring different liquids safely
EVALUATIVE ACTIVITIES
- Name three tools for measuring liquids
- Read measurement from measuring cup correctly
- Measure 250ml of water accurately
- Explain what “ml” means
- Show how to make simple measuring cylinder
LESSON EVALUATION/ASSIGNMENT
Students will:
- Practice measuring liquids at home with family
- Find containers at home with ml markings
- Help family measure ingredients for cooking
- Make measuring cylinder using plastic bottle
WORKBOOK
WEEKLY ASSESSMENT (TEST)
- We measure liquids to find out _______ we have. A. How much B. What color
- _______ is the short form for milliliters. A. ml B. mm
- When reading measurements, look at _______ level. A. Top B. Eye
- A _______ cylinder is tall and narrow for measuring. A. Measuring B. Rolling
- _______ ml equals one liter. A. 100 B. 1000
GYMNASTICS: Basic Movements
Learning Objectives
By the end of this lesson, pupils will be able to:
- Demonstrate basic gymnastic movements
- Name different gymnastic apparatus
- Perform simple activities on gymnastic equipment
Basic Movements in Gymnastics
- Walking
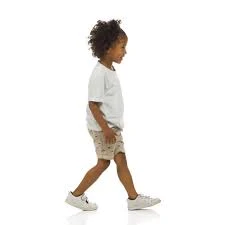
- Walk forward, backward, and sideways
- Keep body straight and balanced
- Use arms for balance
- Running
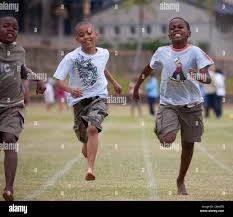
- Run with light, quick steps
- Land softly on balls of feet
- Keep body upright
3. Hopping
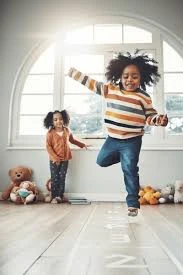
- Jumping
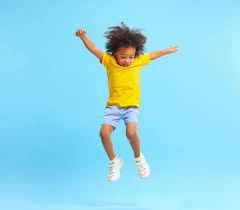
- Jump with both feet together
- Bend knees when landing
- Use arms to help jump higher
- Twisting

- Turn body left and right
- Keep feet on ground
- Move shoulders and hips
Apparatus Activities
Swinging Bars
- Hang from bars with both hands
- Swing body gently back and forth
- Keep grip tight and safe
Floor and Box Activities
Walking Beam Balance
- Walk slowly on narrow beam
- Keep arms out for balance
- Look straight ahead
- Step carefully
Parallel Bars
- Hold bars with both hands
- Keep body straight
- Move slowly and carefully
Pommel Horse
- Simple support positions
- Hold with both hands
- Keep body steady
Safety Rules
- Always warm up first
- Listen to teacher’s instructions
- Use equipment properly
- Help your classmates
Simple Activity
Practice walking on a line on the floor like it’s a balance beam.
Evaluation
- Name three basic movements in gymnastics
- What should you do when landing from a jump?
- How do you stay safe on gymnastic equipment?
Topic: coding
LEARNING AREA
- Introductory Activities
- What is Coding?
- Examples of Coding Around Us
- Why Should I Learn to Code?
- Fun Ways to Start Coding
PERFORMANCE OBJECTIVES
By the end of this lesson, pupils should be able to:
- Know what coding means.
- Give examples of things made with coding.
- Explain why learning coding is good.
- Show interest in trying coding.
TEACHING AND LEARNING MATERIALS
- Computer/tablet
- Smartphone
- Simple coding apps (Scratch Jr.)
- Pictures of apps and games
- Step cards for simple instructions
TEACHING AND LEARNING METHOD
- Simple explanation
- Show and tell
- Fun examples
- Discussion
REFERENCE MATERIALS
- Primary Computer Studies Textbook
- Coding for Kids Guide
ENTRY BEHAVIOUR/ PREVIOUS LESSON
Students can use computers and follow simple instructions.
WORD FILE
Coding, computer, instructions, apps, games, create, fun.
CONTENT
LESSON 1 – WHAT IS CODING?
WHAT IS CODING?
Coding means writing instructions for computers to make them do what we want.
SIMPLE EXPLANATION:
- Like giving directions to a friend
- Tell computer step by step what to do
- Computer follows instructions exactly
- We use special computer language
CODING IS LIKE:
- Recipe for cooking – follow steps to make food
- Building with LEGO – follow instructions to build
- Teaching a dance – show each step clearly
- Giving directions – turn left, go straight, stop
WHAT HAPPENS WHEN WE CODE:
- We tell computer what to do
- Computer does exactly what we say
- If instructions are wrong, computer gets confused
- When instructions are right, amazing things happen!
LESSON 2 – EXAMPLES OF CODING AROUND US
THINGS MADE WITH CODING:
GAMES YOU PLAY:
- Mobile games – Angry Birds, Candy Crush
- Computer games – Minecraft, educational games
- Video games – all games need coding
- Online games – games on websites
APPS YOU USE:
- YouTube – to watch videos
- Camera app – to take pictures
- Calculator – to do math
- Weather app – to check weather
- Educational apps – for learning
WEBSITES:
- Google – to search for things
- School websites – for learning
- Fun websites – for games and activities
- Shopping websites – to buy things online
EVERYDAY TECHNOLOGY:
- Smart TVs – to watch programs
- ATM machines – to get money
- Traffic lights – to control cars
- Elevators – to go up and down buildings
ALL OF THESE NEED CODING TO WORK!
LESSON 3 – WHY SHOULD I LEARN TO CODE?
GREAT REASONS TO LEARN CODING:
CODING IS FUN!
- Make your own games
- Create cool animations
- Build fun projects
- See your ideas come to life
- Feel proud of what you create
CODING HELPS YOUR BRAIN:
- Problem solving – figure out how to fix things
- Logical thinking – think step by step
- Creativity – make new and exciting things
- Math skills – coding uses math in fun ways
- Patience – learn to keep trying
CODING IS USEFUL:
- Future jobs – many jobs need coding skills
- Help with homework – make learning tools
- Create things – make apps, games, websites
- Understand technology – know how things work
CODING IS FOR EVERYONE:
- Boys and girls can code
- Any age can start learning
- No special talent needed
- Just need curiosity and willingness to try
FAMOUS CODERS WHO STARTED YOUNG:
- Bill Gates – started coding at 13, made Microsoft
- Mark Zuckerberg – made Facebook
- Many game creators – started as kids
- You could be next!
LESSON 4 – FUN WAYS TO START CODING
BEGINNER CODING TOOLS:
VISUAL CODING (BEST FOR KIDS):
- Scratch Jr. – drag colorful blocks to code
- Code.org – fun coding games and puzzles
- Blockly – puzzle pieces that fit together
- Tynker – coding adventures and stories
CODING WITHOUT COMPUTERS:
- Follow recipes step by step
- Give directions to friends
- Create treasure hunts with clues
- Make instruction cards for games
SIMPLE FIRST PROJECTS:
- Make a character move across screen
- Create simple animations with moving pictures
- Build basic games like catching falling objects
- Design greeting cards with animations
WHAT YOU CAN CREATE:
- Interactive stories – stories you can click
- Simple games – like tic-tac-toe
- Animated pictures – drawings that move
- Digital art – patterns and designs
LESSON 5 – GETTING STARTED
FIRST STEPS IN CODING:
START SIMPLE:
- Don’t worry about mistakes – everyone makes them
- Try for 10-15 minutes at first
- Have fun and experiment
- Ask for help when needed
BASIC CODING IDEAS:
- Sequence – doing things in order
- Repeating – doing same thing many times
- Making choices – if this happens, then do that
- Events – when something happens, do something
PRACTICE AT HOME:
- Ask parents to help find coding websites
- Try free coding games online
- Practice giving clear instructions for daily tasks
- Think about apps you’d like to create
KEEP LEARNING:
- Try new projects each week
- Don’t give up when things seem hard
- Celebrate when your code works
- Share your creations with family and friends
CODING TIPS FOR BEGINNERS:
- Start with visual tools (drag and drop)
- Make mistakes and learn from them
- Code with friends – it’s more fun
- Be patient with yourself
- Dream big about what you want to create
REMEMBER:
- Every expert was once a beginner
- Coding is like learning a new language
- The most important thing is to have fun
- You can create amazing things with practice
- Anyone can learn to code!
PRESENTATION
- Teacher shows smartphone and explains apps are made with coding
- Teacher demonstrates simple drag-and-drop coding using Scratch Jr.
- Teacher shows examples of games and apps kids know
- Teacher gives step-by-step instructions like coding
- Teacher encourages students that they can learn coding too
STUDENT ACTIVITIES
Students practice:
- Giving step-by-step instructions to classmates
- Identifying apps and games they use
- Trying simple drag-and-drop coding
- Discussing what they’d like to create
- Following and giving clear directions
EVALUATIVE ACTIVITIES
- Explain what coding means in simple words
- Name three things made with coding
- Give two reasons why learning coding is good
- Show how to give clear step-by-step instructions
- Express interest in trying coding
LESSON EVALUATION/ASSIGNMENT
Students will:
- Ask parents about coding apps on family devices
- Try a simple coding game at home (with help)
- Give step-by-step instructions for a daily task
- Think of an app or game they’d like to create
WORKBOOK
WEEKLY ASSESSMENT (TEST)
- Coding means writing _______ for computers. A. Letters B. Instructions
- _______ and games are made with coding. A. Apps B. Books
- Learning to code helps improve _______ skills. A. Problem solving B. Sleeping
- _______ Jr. is a good coding tool for beginners. A. Scratch B. Paper
- _______ can learn to code. A. Only adults B. Anyone
This term's Basic Science topics
Basic 4 Second Term · 9 topics
- Soil, Track Event, and Typing and Saving on Microsoft Powerpoint.
- Soil (II): Track Event, and Typing and Saving on Microsoft Powerpoint.
- Soil (II): Growing of Plants & Waste Disposal
- Mixture, Physical Fitness, Virus
- Technology(I), Games: Basketball Skills, Anti-Virus
- Technology III, Game and What Is Coding
- Measurement (Measuring Liquids), Gymnastics, and Coding
- Measurement, Food/Nutrition, Use of Coding
- Shape Construction with Paper(I) and Safety at Home and School
Second Term Basic Science Lesson Notes for Other Topics
Demonstrating Air in Space
Read the full lesson note.
Air
Read the full lesson note.
Light Energy, Uses of Light and Colour
Read the full lesson note.
Colour Identification 1 - Colours of Objects
Read the full lesson note.
Colour Identification II- Road Traffic Light Signs
Read the full lesson note.
Colour Identification III - Road Markings
Read the full lesson note.
Soil
Read the full lesson note.
Soil II: Importance & Things Found in Soil
Read the full lesson note.
Water - Purifying Water
Read the full lesson note.
Water - Packaged Water
Read the full lesson note.
Soil I - Importance to Plants
Read the full lesson note.
Input Devices
Read the full lesson note.
Air in Motion I - Wind
Read the full lesson note.
Air in Motion II - Harmful Effects of Wind
Read the full lesson note.
Water
Read the full lesson note.
Lesson Notes for Other Classes

Basic 1 Lesson Note
The complete lesson note to guide your studies.

Basic 2 Lesson Note
The complete lesson note to guide your studies.

Basic 3 Lesson Note
The complete lesson note to guide your studies.

Basic 5 Lesson Note
The complete lesson note to guide your studies.

Basic 6 Lesson Note
The complete lesson note to guide your studies.
JSS1 Lesson Note
The complete lesson note to guide your studies.