Keyboarding JSS3 Business Studies Lesson Note
Download Lesson NoteTopic: Keyboarding
Keyboarding is the act of manipulating a keyboard to produce information. In other words, keyboarding is the utilization of a keyboard for typing and other computer functions. The keyboard exists both in typewriters and in computers. But in typewriting, keyboarding does not have to result in hard copy whereas typewriting usually does.
Keyboarding is used as a communication tool to convey information to others. Before the invention of the typewriter, Man first recorded his ideas and messages on stone, then on leather, and later on paper which was much lighter than either stone or leather. The use of paper allowed man to send his thoughts to other people many kilometers away. The preparation of these messages, however, took a long time, even with the use of pen and paper. Then the typewriter was invented in 1829.
International paper sizes.
Paper sizes are produced and prepared based on folding and getting half of such a paper to arrive at other sizes.
The large + sizes of the international paper is AO half of it is A1 – AO.
A1 is half of AO 594mm * 841mm
A2 is half of A1 594mm * 420mm
A3 is half of A2 297mm * 420mm
A4 is half of A3 219mm * 297mm
A5 is half of A4 148mm * 210mm
A6 is half of A5 105mm * 148mm
A7 is half of A6 74mm * 105mm
Foolscap 330mm * 203mm
Six Mo 203mm * 165mm
Quarto 254mm * 203mm
Octavo 203mm * 127mm
Paper size landscape portrait
A6 25 35
A7 17 25
Foolscap 48 78
Six Mo 39 48
Quarto 38 60
Octavo 30 48
VERTICAL DISPLAY
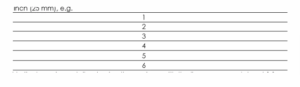
Whether a typewriter has pica or elite typeface it should produce six standard line spaces to a vertical inch (25 mm). Six clear single-line spaces make one vertical inch (25 mm), e.g.
Vertical spacing entails returning the carriage with the line space regulator at 1 from the top edge of the typing paper to the bottom edge of the paper.
When the content is vertically displayed, the top and bottom margins must be equal. To centre items, vertically, for example on A5 portrait paper, the procedure is as follows:
- Insert A5 portrait in the typewriter with the left edge on 0.
- Clear all the tab stops.
- Move the margin stops to the extreme left and right of the carriage.
- Set the line space regulator at 1.
- Adjust the typing paper on the roller.
- Recall the number of vertical line spaces on the A5 portrait.
- Count the number of lines on the material to be typed.
- Subtract the number of lines on the material from the number of line spaces on the A5 Portrait.
- Divide the remainder by 2, and add one space.
- From the top edge of your typing paper, return the carriage the number of single-line spaces arrived at in Step 9 and type the first line, etc.
HORIZONTAL DISPLAY
In horizontal spacing, 1 inch (25 mm) on an elite typewriter contains 12 characters (12 horizontal spaces) while on a pica typewriter, 1 inch (25 mm) contains 10 characters (10 horizontal spaces).
To centre the content horizontally, the left and right margins must be equal. Proceed as follows:
- Clear all tabs.
- Move the margin stops to the extreme left and right of the carriage.
- Set the line space regulator to 1.
- Insert A5 landscape paper, for example, with the left edge on 0.
- Adjust the paper evenly on the roller.
- Read the scale point on the right edge of the paper, pica is 82, elite is 100.
- With a pencil, mark in pairs the characters, including spaces and punctuation marks, on each of the horizontal lines you wish to center.
- Bring the typing point to the center of your typing paper, pica 41 and elite 50.
- From this centre half, backspace once for every two letters on the horizontal line and type the first line at the point reached.
- Return the carriage to the centre and backspace once for every two letters in the second line and type the line at the point reached.
- Repeat these steps for the third and subsequent horizontal lines.
EVALUATION
- How will you interpret the expression ‘JESUS IS LORD’?
READING ASSIGNMENT
Read BUSINESS STUDIES FOR JS3 BY O. A. LAWAL and others pages 102-102.
WEEKEND ASSIGNMENT
- When matter is vertically displayed, the top and bottom margins must be ______.
- even number B. uneven C. equal D. unequal
- Whether a typewriter has pica or elite typeface it should produce ______ standard line spaces to a vertical inch (25 mm). A. six B. seven C. eight D. nine
- When items are displayed in closed capitals the space between each word should be — A. three B. two C. one D. four
- Displaying work in spaced capitals will involve ______ spaces between words. A. one B. two C. three D. four
- The appropriate finger for depressing the spacebar is ____________________________.
- right thumb B. left thumb C. right index finger D. left index finger
THEORY
- Type the following expression in spaced capitals: ‘The quick brown fox jumps right over the lazy dog.’
- List and type with a typewriter, 15 parts of the typewriter.
INSERTING OR CREATING A TABLE
You can use a table template to insert a table
- Click where you want to insert a table
- On the insert table, in the table group, click table, point to quick table, and then click insert table
- Replace the data in the template with the data you want.
Using insert tables commands
- Click where you want to insert tables
- On the insert tables, in the table group
- Under table size, enter the number of columns and rows
- Under Autofit behavior, choose the option to adjust the table size
Third Term Business Studies Lesson Notes for Other Topics

Alphanumeric Keys
Explore lesson notes covering all topics.

Parts Of Computer Keyboard
Explore lesson notes covering all topics.

Basic Service Keys
Explore lesson notes covering all topics.

Home Row Keys
Explore lesson notes covering all topics.

Correct Keyboarding Techniques
Explore lesson notes covering all topics.
Care Of The Computer
Explore lesson notes covering all topics.

Introduction To Keyboarding
Explore lesson notes covering all topics.

Double Entry Bookkeeping
Explore lesson notes covering all topics.

Journal/Day Book
Explore lesson notes covering all topics.
Source Documents
Explore lesson notes covering all topics.

Types Of Display Headings
Explore lesson notes covering all topics.
Manuscript
Explore lesson notes covering all topics.
Erasing Techniques
Explore lesson notes covering all topics.

Correct Keyboarding Techniques
Explore lesson notes covering all topics.

Alphanumeric Keys
Explore lesson notes covering all topics.

Lesson Notes for Other Classes

Basic 2 Lesson Note
The complete lesson note to guide your studies.
Basic 3 Lesson Note
The complete lesson note to guide your studies.

Basic 4 Lesson Note
The complete lesson note to guide your studies.

Basic 5 Lesson Note
The complete lesson note to guide your studies.

JSS1 Lesson Note
The complete lesson note to guide your studies.

JSS2 Lesson Note
The complete lesson note to guide your studies.