Graphic Packages SS2 Data Processing Lesson Note
Download Lesson NoteTopic: Graphic Packages
Computer Graphics are graphics created using computers and, more generally, the representation and manipulation of image data by a computer.
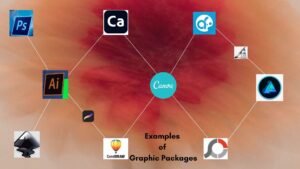
EXAMPLES OF GRAPHICS PACKAGES
- Paint
- CorelDraw
- Adobe Photoshop
- Harvard graphics
- Print Master
- Ventura
- Photoshop Pro
- Adobe Page Maker
FEATURES OF CORELDRAW OR CORELDRAW ENVIRONMENT
- Title Bar
The title bar displays the name of the CorelDraw file on which you are working. It is also used to reposition the CorelDraw window on the screen.
- Menu Bar
There are 11 pull-down menus in the menu bar. All menu commands are found in these pull-down menus.
- Rulers
Rulers serve as a positioning and sizing aid. They can be turned off optionally. In addition, you can drag guidelines off the rulers to serve as drawing aids.
- Scroll Bars
The scroll bars allow you to shift the page horizontally and vertically.
- Drawing Windows
The large white portion of the screen is the drawing windows. The rectangle with the drop shadow is the printable page.
- Roll-up Window
The Transform (Position) roll-up is shown on the left. Although they are not a permanent part of the interface (they can be if you want). You can use them to control many of CorelDraw’s operations. Their beauty lies in the fact that they can remain active for playing quick “what-ifs” without going through the longer process of invoking a standard menu dialogue box.
- Status Bar
The status bar shows the fill pattern, outline location, movement and absolute coordinates of selected objects.
- Colour Palette
The colour palette allows for the quick application of a coloured fill or outline colour. Selecting the scrollbar at the bottom of the palette opens an expanded colour palette.
- Page Counter
CorelDraw allows you to create drawings consisting of multiple pages. The total number of pages is displayed in the page counter box along with arrows that allow you to page forward or back in your document.
- Standard Toolbar
The toolbar provides quick access to commonly used features. Almost all of these can be accessed through the Menu Bar. CorelDraw provides a series of different toolbars for your use. Additionally, the toolbar is completely customizable. You can add buttons to invoke just about any command that you regularly use.
NOTE: There are keyboard shortcuts that are often faster than toolbar usage. Once memorized, you won’t need to waste precious time with a Toolbar button.
Ctrl + S = Save; Ctrl + P=Print; Ctrl + Z=Undo; Ctrl + X = Cut; Ctrl + C =Copy; Ctrl + V= Paste
OPERATIONAL TOOLS
The operational tools are as follows:
The Toolbox: The toolbox provides you with operational tools. The basic categories of tools are:
- Utility Tools
- Diagramming Objects
- Interactive Tools
- Painting Tools
Utility Tools are:
a) The Pick Tool
– For selecting objects.
– For moving, sizing, rotating and skewing objects.
b) The Shape Tool
– For editing the shapes of the diagramming object and text.
– The shape fly-out gives access to knife tools, eraser tools, and Free Transform tools.
c) The Zoom Tool
– For changing views.
– The zoom fly-out gives you access to the Panning tool.
Diagramming Object. These are:
a) The Freehand Tool
– For drawing straight lines, and curves.
– For auto-tracking a bitmap image.
– The freehand fly-out gives you access to the Bezier (curve) tool; Natural Pen tool; Dimension line tool and connector line tool.
b) Rectangle Tool
– For drawing rectangles and squares.
c) Ellipse tool
– For drawing ellipses and circles.
d) The polygon Tool
– For drawing multi-sided shapes like stars or polygons.
– The polygon fly-out gives access to the spiral tool and Graph paper tool.
e) The Text tool
– For placing Artistic text and paragraph text.
Interactive Tools. Examples:
a) Interactive fill Tool
– For placing various fills on the page interactively.
b) Interactive Transparency Tool
– For creating transparent effects interactively.
c) Interactive Blend tool
– The interactive Blend fly-out gives you access to the new distorted tool; Interactive envelope; Extrude and Drop shadow tools.
Painting Tools: Includes:
a) Outline Tool
– For setting outline thickness and colour.
– For creating line-ending attributes.
– For creating calligraphic effects.
– For applying dash line patterns.
b) Fill Tool
– For setting fill colours and screens.
– For creating fountain fill.
– For applying pattern tile fills.
– For applying texture fills.
– For applying special PostScript fills.
DESIGNING DRAWINGS: PRACTICALS
- Loading CorelDraw Application
To access the CorelDraw application, take the following steps:
- Click on the start button
- Point to all Program
- Point to CorelDraw Graphic Suite 12 (Depending on the version you are using)
- Select CorelDraw
- Exiting CorelDraw
To leave the CorelDraw environment, take the following actions;
- Save your drawing (In CorelDraw your document is called drawing)
- Click on File Menu and select Exit.
- Drawing Shapes
After loading the application:
- On the toolbar, Click Shapes.
- At the drawing area, drag to create a shape.
- Add Colour to your Shapes
After drawing your shapes;
- Select the Drawing by clicking on it.
- On the Toolbar, Click on the Fill Colour.
- Convert your Writing to Curve
- In your drawing area, type the text.
- Draw a circle shape beneath the text.
- Select all.
- On the Text Menu, Click on “Fit text to Path”.
- Click on the Circle Shape only and delete it.
ASSIGNMENT
Design the following:
- National Flag
- School Logo/Badge
- Coat of Arm
- Complimentary Card
- LetterHead

Third Term Data Processing Lesson Notes for Other Topics
Web Design
Explore lesson notes covering all topics.
Internet
Explore lesson notes covering all topics.

Presentation Packages
Explore lesson notes covering all topics.
Marketing
Explore lesson notes covering all topics.

Safety Measures
Explore lesson notes covering all topics.

Computer Ethics
Explore lesson notes covering all topics.
Database Management System II
Explore lesson notes covering all topics.

Database Management System
Explore lesson notes covering all topics.

Word Processing II
Explore lesson notes covering all topics.
Spreadsheet
Explore lesson notes covering all topics.


Lesson Notes for Other Classes

JSS1 Lesson Note
The complete lesson note to guide your studies.

JSS2 Lesson Note
The complete lesson note to guide your studies.

SS1 Lesson Note
The complete lesson note to guide your studies.

SS3 Lesson Note
The complete lesson note to guide your studies.